
Talking Head User Guide
Video layouts and title animation made easy.
Talking Head is an Effect template for Final Cut Pro and was inspired by news channel format for “remote” interviews. A talking head is usually a camera shot in a kind of Picture-in-Picture format. However, most picture-in-picture effects for Final Cut are accomplished by the use of Titles or Generators using Drop Zones. Anytime a drop zone is involved, all audio from any clip applied to the drop zone is gone. If audio is needed, the audio track must by reapplied to the storyline and manually sync’d for the drop zone media. Talking Head is not a drop zone – it is the actual clip with all its properties loosened from the confines of the video full frame.
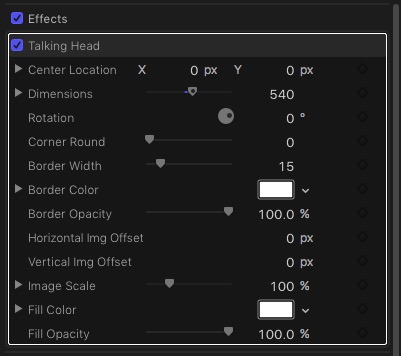
Talking Head has an OnScreen Control (OSC) to assist in making your clip layouts exceptionally easy. Size your Talking Head with the Dimensions parameter (dial down the disclosure triangle to set the Width and Height separately) then drag it into position with the OSC. Use the Horizontal and Vertical Img Offsets to reveal the portion of your clip required and use Image Scale if necessary to fit your subject inside the dimensions you have set. It is possible to animate the Horizontal and Vertical Img Offsets to slide your subject into the Talking Head “space”. There are controls for “Fill Color” and Fill Opacity to create a custom solid color background, or set the Opacity to zero to have the clip below show through. There are similar controls for the border.
Talking Head is a “modular” effect. It can be applied along with any other effect and it is layer sensitive (effects added after Talking Head will affect the Border and Fill (if exposed). You can change the order of effects applied to a clip by using the mouse to drag them in the Video Inspector over or above other effects already applied.
Using Talking Head to create custom title effects
When added to a title like Basic Title, Talking Head can turn the title into text with a background fill, or outlined, or both. Text can be animated by Position and Rotation via the Position and Rotation controls added by the effect. Text can be animated inside the Talking Head frame to make a scrolling text effect, or a “news crawl” effect. Use the Horizontal and/or Vertical Img Offset parameters to keyframe the animation. See the video below for ideas.
Layering
More than one Talking Head can be applied to a clip to create other effects as well, for example:
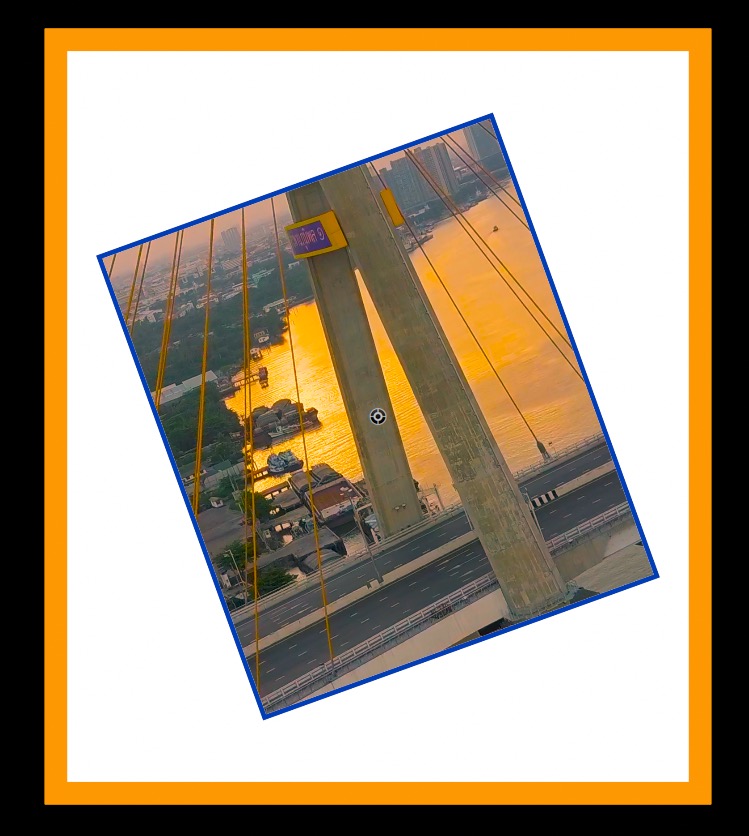
Talking Head 1, blue outlined clip. Talking Head 2, orange outlined with white background.
Tip for building a “slide” in effect:
The best workflow is to build your “final” layout. Size all your Talking Head effects in the “canvas”. Move the playhead into the clip by a few seconds. Set a Keyframe on the Center Location parameter and the Dimensions parameter. Back up the playhead several frames (depending how fast you want the effect to animate – it can be changed later). Set the Dimension Width (or Height) to zero. Use the OSC (or click and drag on the Center Location X parameter) to move the Talking Head clip to line up next to the section you want it to expand from. Play. If done correctly, the left (or right) edge will remain stationary and the clip width will expand to fill the originally designed area. See video for example.
Installation Instructions. (Talking Head is an Effect).
Keep up to date with Sight-Creations on Twitter and Facebook.
A good place to see all of my effects as well as several tutorials and other demonstrations in use is on my YouTube channel.