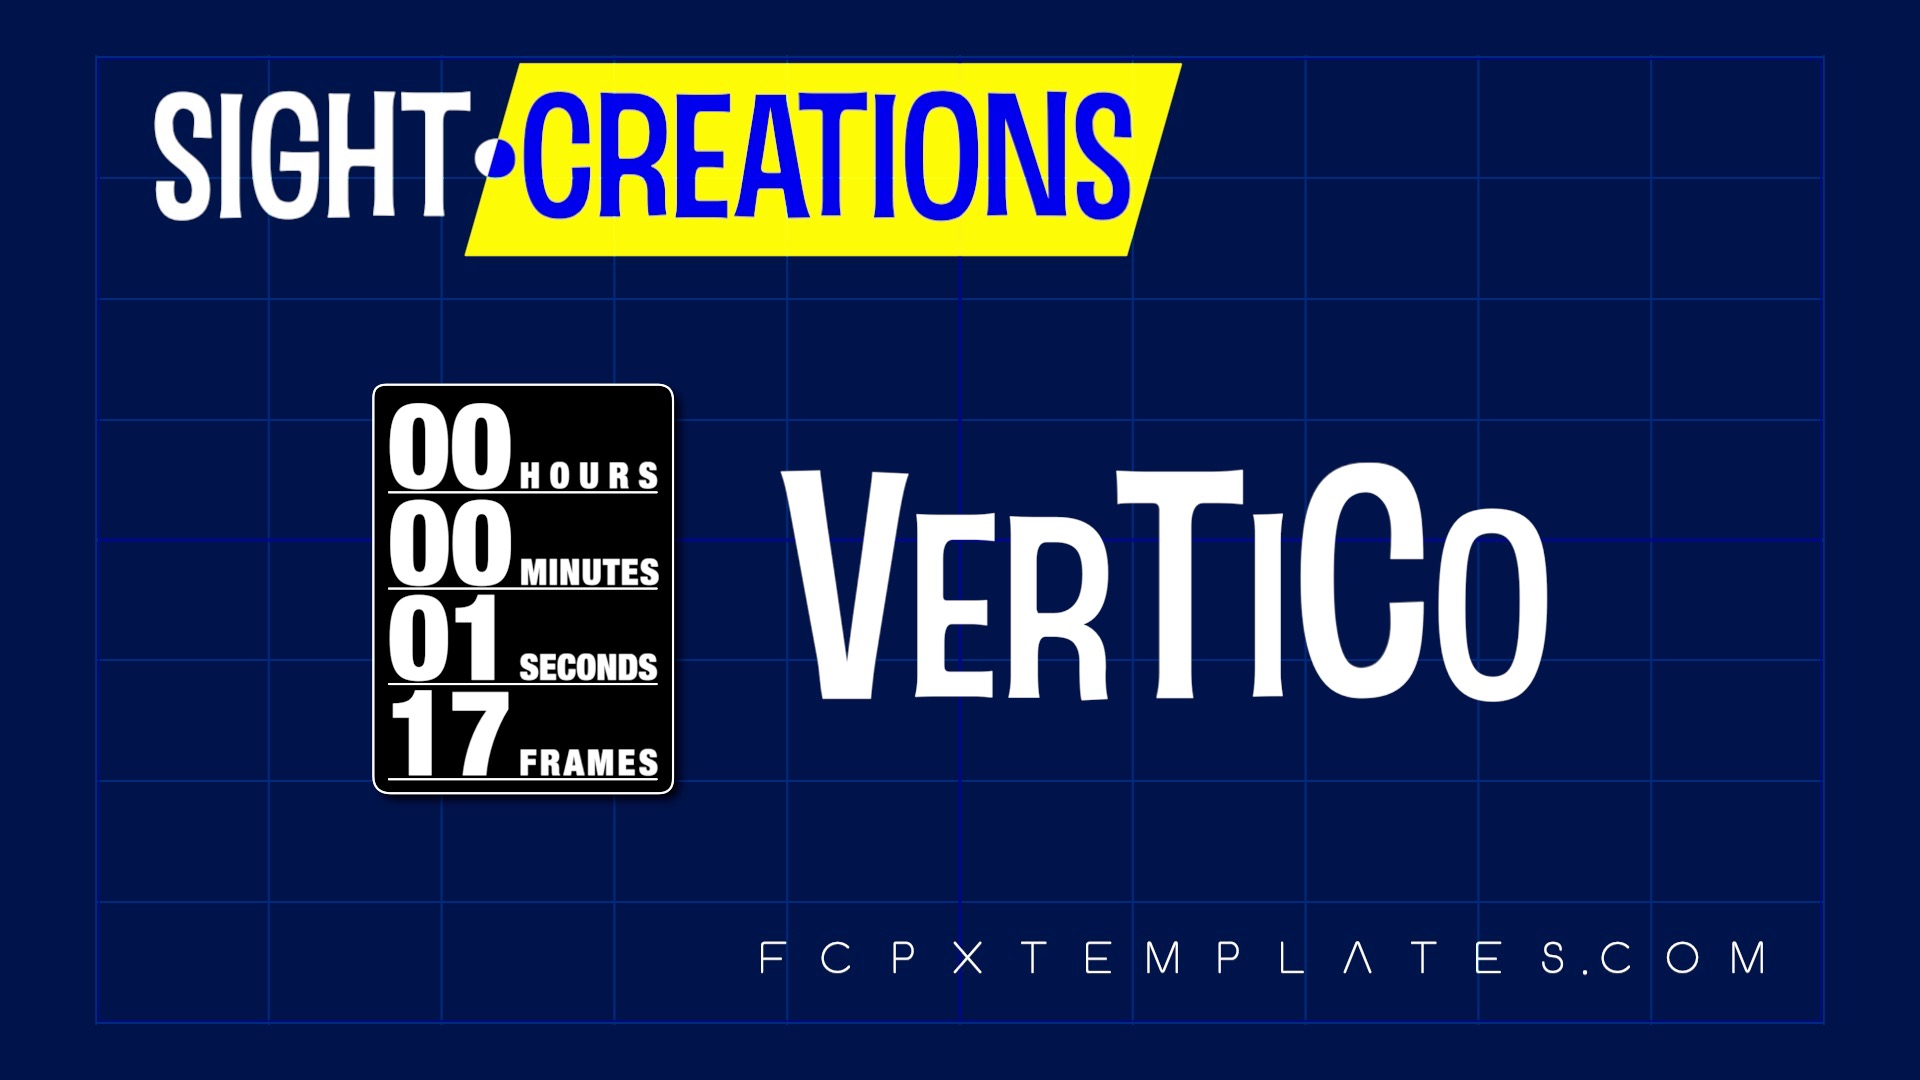

VerTiCo — Versatile (or Vertical) Time Code
Timecode doesn’t have to look like timecode.
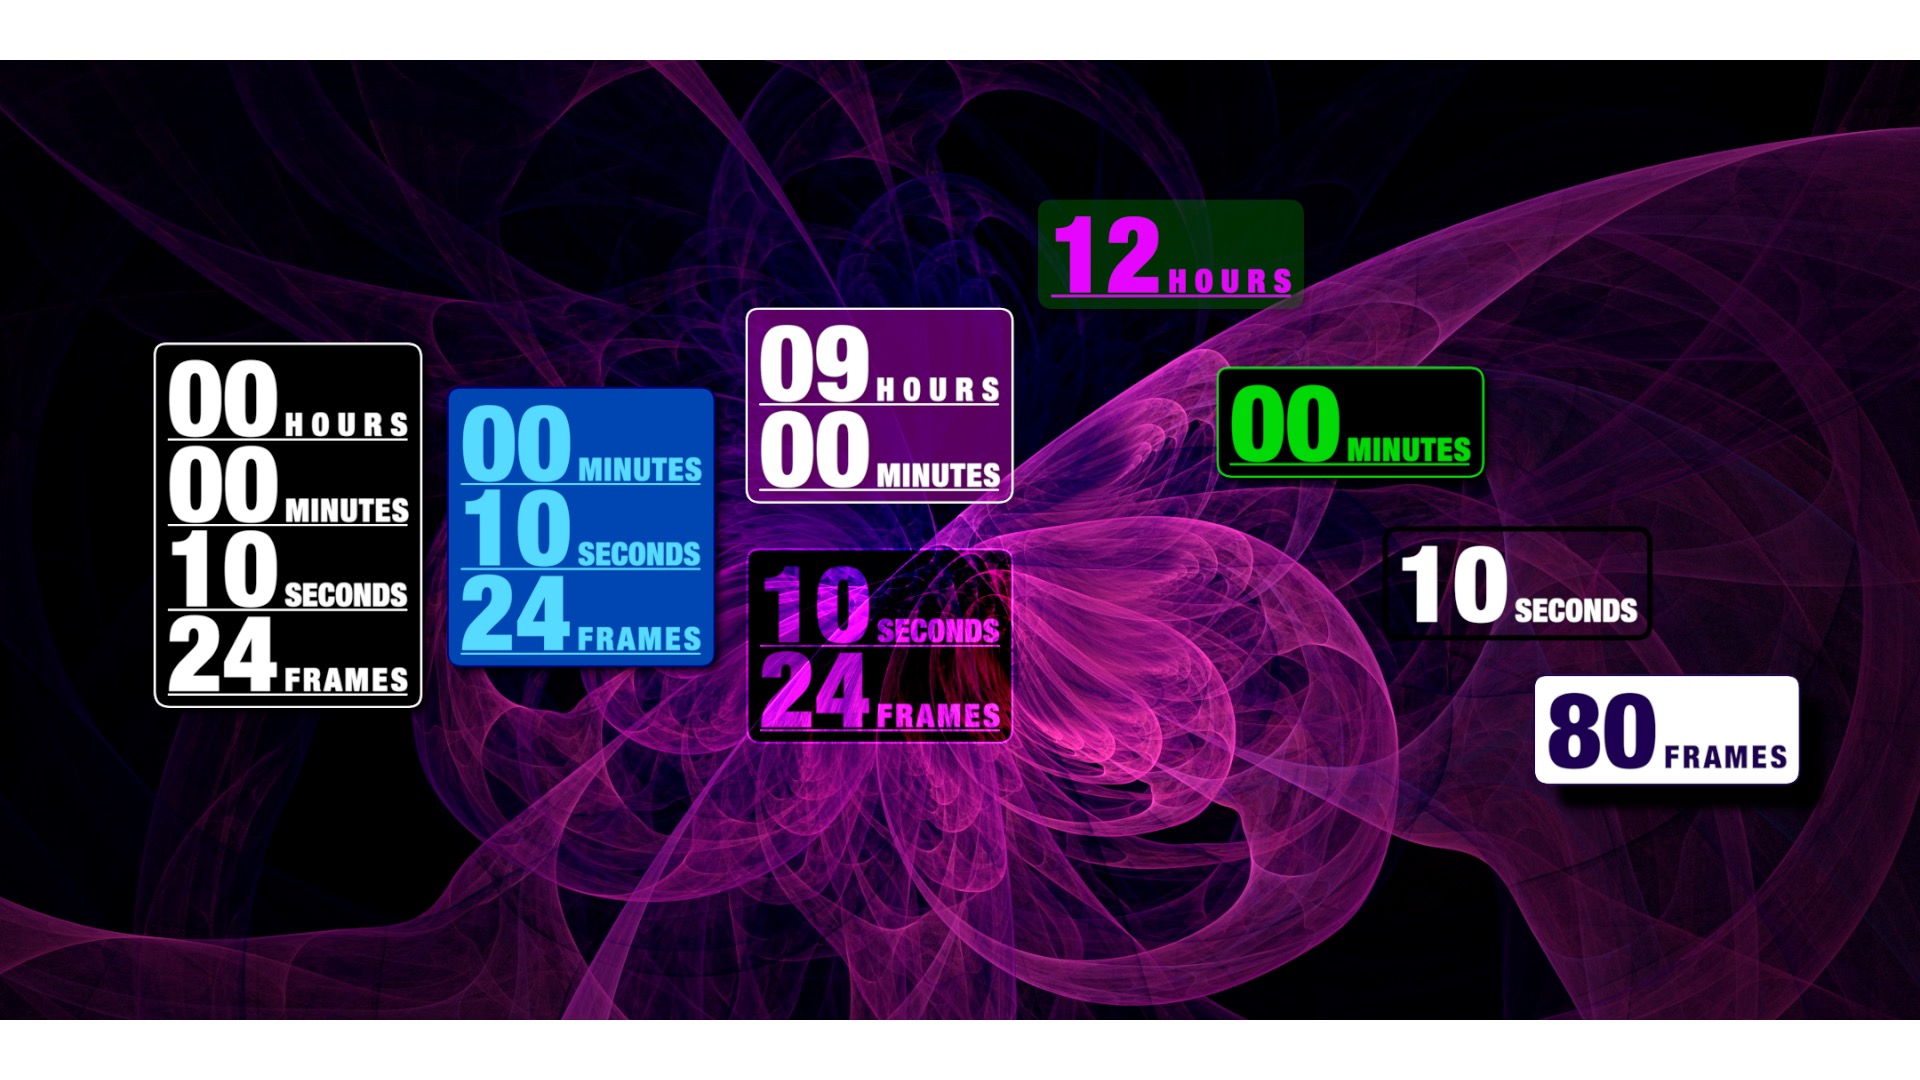
VerTiCo defaults to a vertical layout but each section can be turned off. It is possible to have each section soloed. If you add more instances of VerTiCo to a clip, and solo each section, you can arrange the time any way you want!
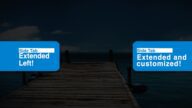
Here are a few layout examples:
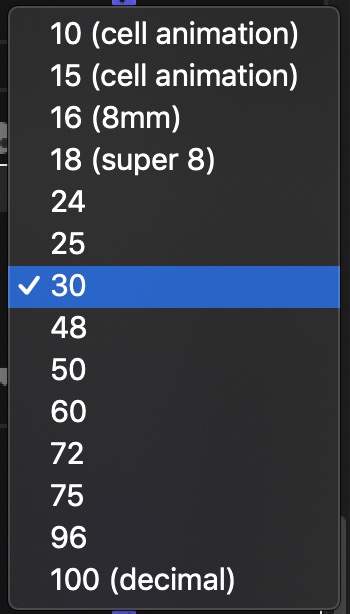
These are the supported frame rates. You can use any of them in any whole frame rate project and maintain accurate timing, although the effect will be best in 24, 25, 30, 50 and 60 fps projects with the matching frame rate selected especially if you’re burning the time in your video.
Parameters:
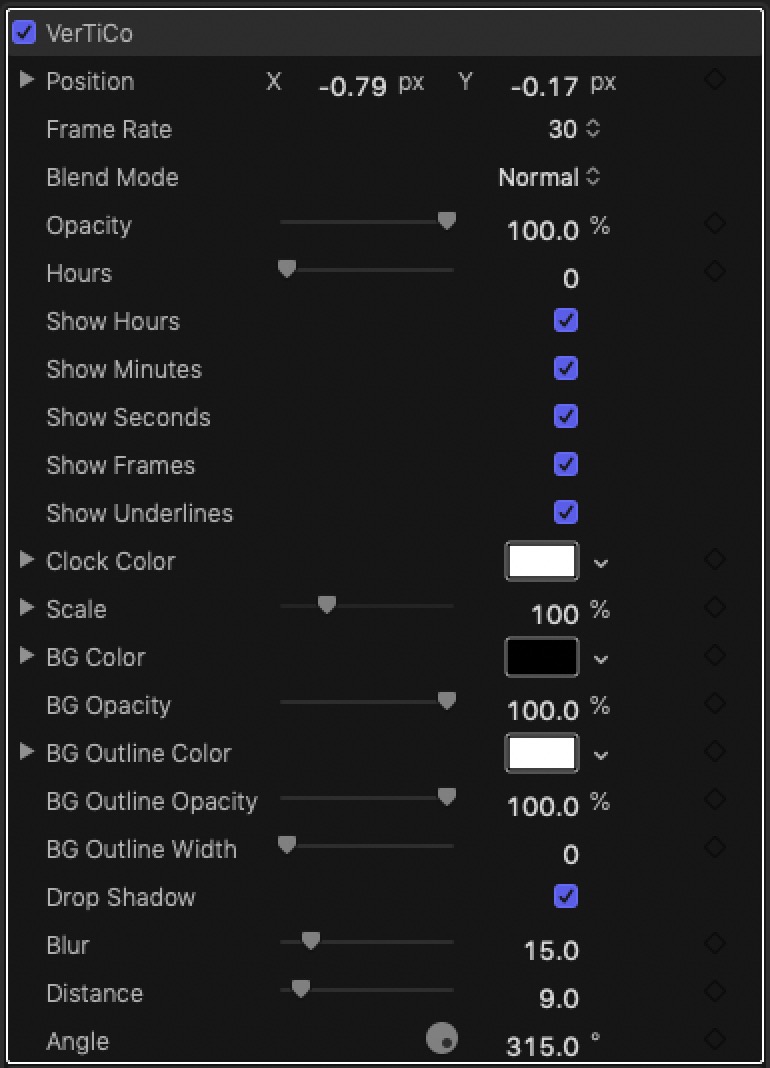
Position is control by an OnScreen Control but can be manually set (and/or keyframed).
Frame rate works no matter when project frame rate you use. Accuracy is only maintained for “whole frame rate” project (fractional frame rate projects will have minor drift.)
You can blend this effect with your video with Blend Mode.
You will have to manually set the Hours (see Suggestions below).
Options for which part of the clock to display (see Suggestions).
Clock color is the “face” color.
Scale is used to size the effect with respect to the anchor point (Position).
The rest are basic Color and Drop Shadow features that can be applied.
Suggestions:
To create a project timecode, apply this effect to a Title (and remove the default, or use the default text as a label). Start the Title on the 0 frame and stretch the Title for the length of the project OR, for exactly one hour. With the Title object selected, double click on the Playhead clock and type: “1…” to make the length exactly 1 hour. [This is a timecode shortcut allowed by FCPX — that’s 1 followed by three periods.]
For a project longer than an hour, add another title aligned to the first on and set the Hour parameter to the next hour.
For clip timecode, apply this effect directly to a clip, image or generator (you will not be allowed to add effects to transitions.)
The Show options allow you to set which parts of the clock you want shown. Since VerTiCo is an effect, you can add as many “instances” as you need to create your personal layout preference. As always with Effects in FCPX, you can save an Effects Preset which will contain all the instances with all their settings and apply it to other clips later on without having to rebuild your preferred layout without having to do the work again.
Animating this effect or its individual sections can be made easy with our Animate by Time or Highlighter set of effects (although you will have to limit their use to Titles like the Basic Title or an “Adjustment Layer”. You can stack a series of Titles with this effect and Animate by Time effects as I have done in the Demo video below. With snapping, aligning title lengths to clip lengths is simple.
Demo:
Keep up to date with Sight-Creations on Twitter.
A good place to see all of my effects as well as several tutorials and other demonstrations in use is on my YouTube channel.