
S•C Retimer User Guide
Perform complex retiming of clips without blading. Forwards, backwards, freeze frames, anything without making any cuts, and it’s very easy to make adjustments at any time using the Video Animation editor. And! Keyframed adjustments can be eased!
SC Retimer is an effect for playing with the timing of a clip.
SC Retimer has a built in oscillator and stop motion feature.
SC Retimer can be used for normal playback of a clip. It uses only the frames within the clip however it has been trimmed. If you trim a clip after applying SC Retimer, you should readjust the Clip Length parameter if accurate information is important for you. You may, however, set any time length you want (see “Trick” below) or ignore it altogether.
SC Retimer features an onscreen dashboard/calculator to assist in designing your effect.
Although not absolutely necessary, you begin by entering the length of the clip by copying the number you see under the timecode clock in the viewer. The time entered is fixed to the time base of the project. A 24 fps project uses the time entered at 24 frames per second. It’s that easy. (All clips applied to a storyline are conformed to the frame rate.)
Note: if you’re using drop frame framerates, round to the nearest progressive framerate. 23.98 to 24, 29.97 to 30 and 59.94 to 60. This effect only counts full frames and cannot adjust for the dropped frames.
You can use the same timecode entry shortcuts in the inspector as you would for the timecode clock. For example, typing 9.5 sets the length to 9 seconds and 5 frames. The “leading” zero is not required. Another example would be 13. (ends with a period) enters 13:00 in the time. You can also click and drag on the number values in the inspector to set the time.
While it is not necessary to enter the precise length of the clip, it will be very much more helpful. The time is always with respect to the project and not the clip (consider that no matter what clip you use, it is conformed to the project frame rate!)
All the other values in the calculator dashboard represent:
1) the currently “selected” frame (Playhead)
2) the half amplitude frame count (right top)
3) the full amplitude frame count (right middle)
4) the current “playing” frame (even if it is the red zone)
The following assumes a 10 second clip in a 24 fps project. The Total Frames is 240, numbering from 0 to 239.
All parameters in the inspector are set up as percentages. You can read the frame values from the calculator.
Trick: input a Clip Length value that is exactly 100 frames to convert the values in the dashboard to percent. For example, in a 30p project, set the Clip Length time to 3:10 (3 seconds * 30 + 10 frames). For a 24p project, use 4:04 (4 seconds * 24 + 4 frames). For a 60p project, use 1:40.
The Dashboard Red and Green Zones
All playable frames are within the Green Zone. It is possible for the combined actions of this effect to go outside the green zone. It is possible that the calculated frame number can be outside the playable range.
Think of your clip as an Image Sequence.
When you add this effect to your clip, it no longer “plays”. You need to set up how it will play with this effect.
The Playhead. This parameter allows you to “select” which frame is displayed. It can be keyframed to play the clip “normally” or used to advance or reverse playback. Any order of keyframing will alter how you clip will play.
Oscillate: Oscillation is off be default. To turn it on, select the checkbox.
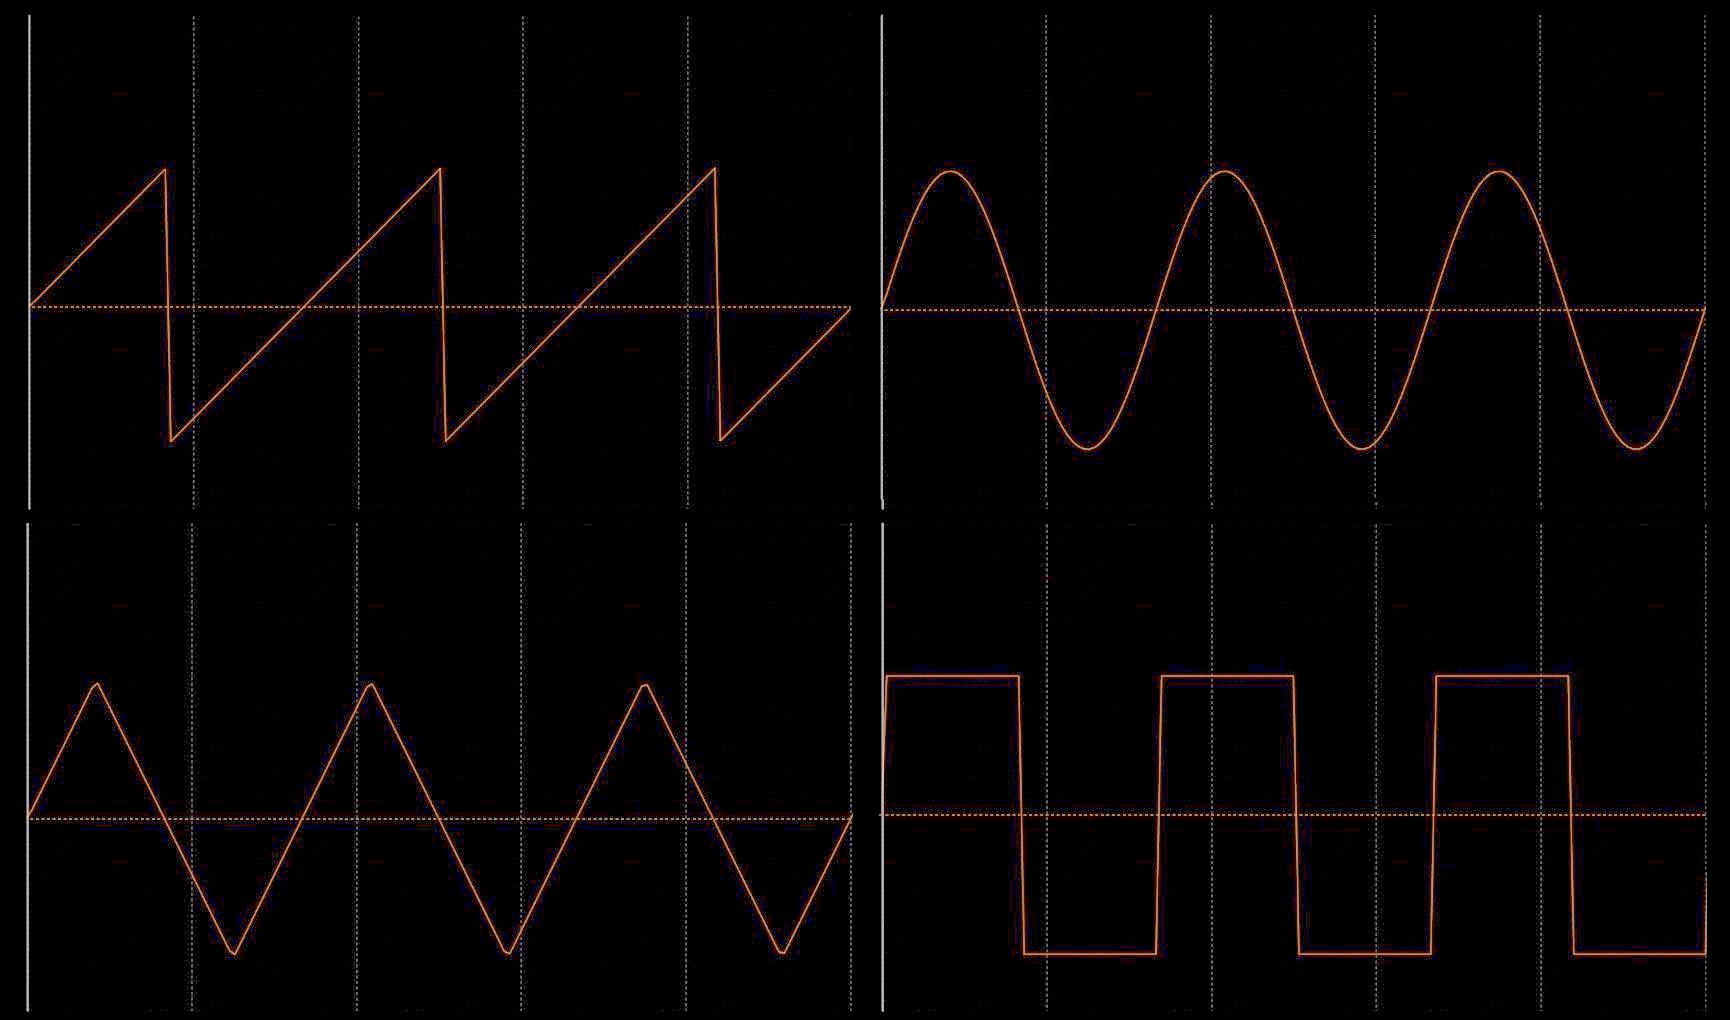
Wave Shape defaults to Triangle which is linear changes between the amplitude peaks. Sine will ease both near the amplitude peaks. Sawtooth will always go from the minimum value to the maximum value, then reset (like an “instant replay” effect). Square will alternate the displayed frames between the minumum and maximum.
Phase: All the curves start at the midpoint between minimum and maximum. Phase allows you to offset the starting point. For Triangle and Sine, setting Phase to -50% sets the animation start at the minimum (forward going).
Stop Motion: Turning on this option will create a easy to accomplish stop motion effect.
Steps over Range: No matter how long the clip is in “real time”, this value will play the number of (whole number) frames you set over the length of the clip. No matter if your clip is one second or much longer, only the indicated number of frames will be played. So you will need to gauge how to set this value based on how long your clip is. It may also depend on how fast you’ve set the playback with the Playhead parameter or oscillation.
The CLIP COPY section deals with resizing and orienting the effect. By default, the background original clip source is turned off. If you need to use Effect Masks (color correction, or for other effects) turn on the Source and use it (you will have to move the SC Retimer affected layer — scaling to 0 will completely remove it — but you just need to get it out of the way enough to create the mask.)
Stretching out the effect:
You can play and/or replay the same frames over and over from a clip, but where do you allocate the time? Simply use FCPX to retime a clip to as slow as you need for as much time as you need. You aren’t going to be seeing the original clip playing slow. Use as long as you need to keep reusing the frames with SC Retimer. [Speeding up a clip will not work as well!] Do not trim any frames from the original clips that you need to be able to “play”.
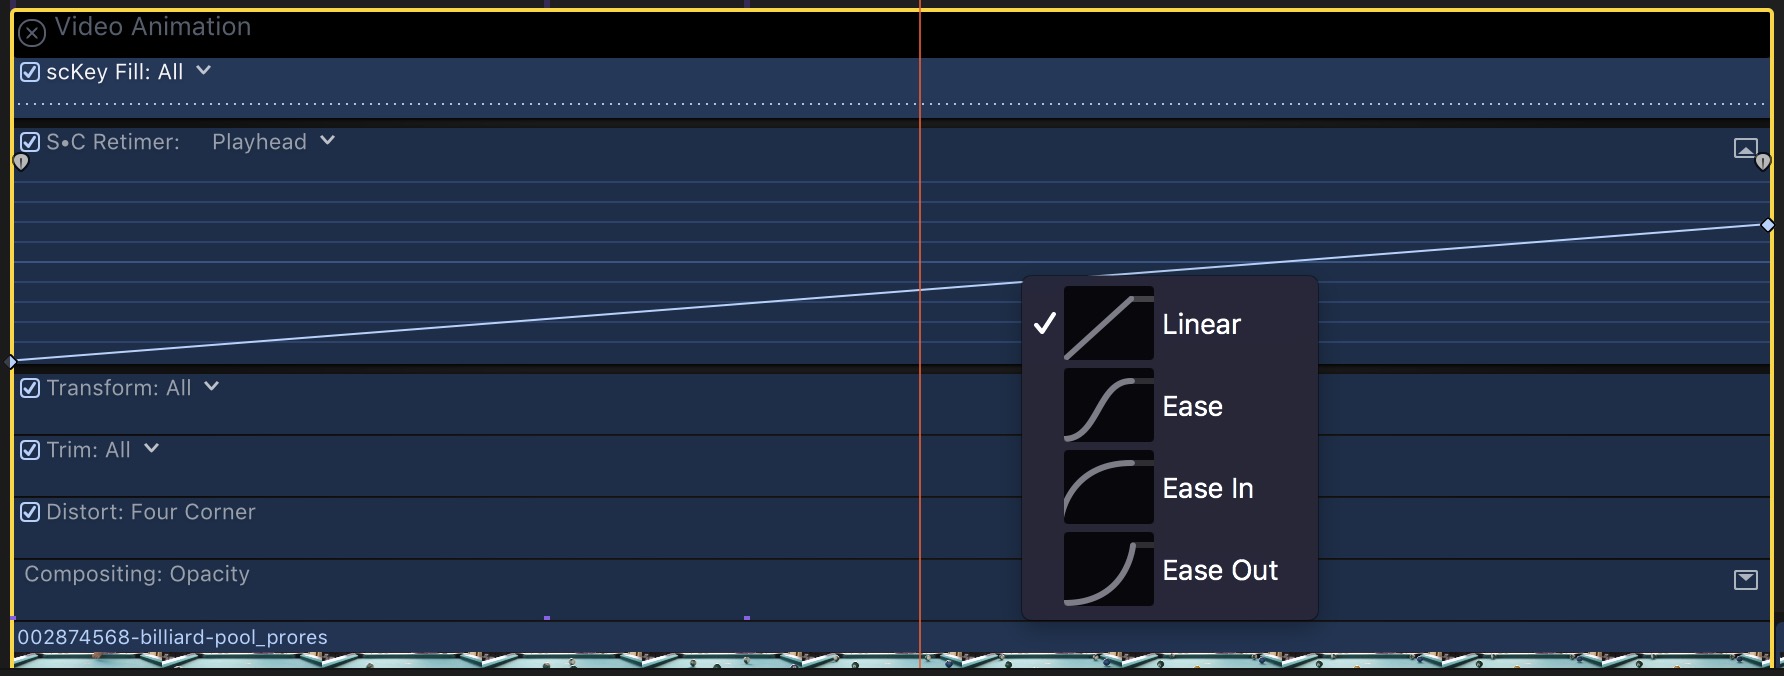
Keyframing the Playhead parameter has the extra added benefit of Easing. Use the Video Animation feature and select Playhead from the dropdown menu for the effect. Right-click on the line connecting keyframes and choose the easing you want to enhance your effect. For example, slow down the playback at the end of a segment to a freeze frame; or vice versa.

Consider the possibilities! From fast motion to freeze frame! Instant Replay or dancing zombies; stop motion effects. How about “crazy credits”?