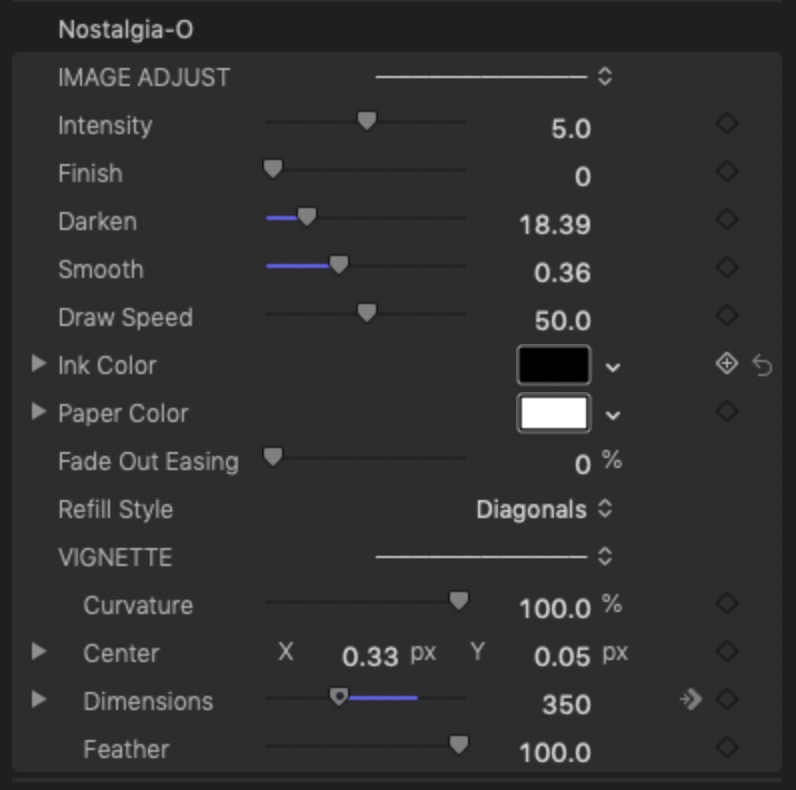
Nostalgia Transition
Designed for the storytellers
The second fades out the incoming clip, builds the sketch, then has three options to move to the outgoing clip: 1) it erases the art to the clip in diagonal strokes, 2) it erases the art in back and forth motion like erasing a blackboard, and 3) it can be made to fade into the outgoing clip. These options are from the “Refill Style” dropdown menu.
Parameters
Here is a look at the available parameters at the right.
Both transitions have exactly the same parameter options *except* Nostalgia-O has the Refill Style menu option and Nostalgia does not.
You can colorize the artwork with the Ink and Paper Color parameters (and these can be keyframe animated!)
The four primary IMAGE ADJUST parameters have been discussed above.
Draw Speed can be used to slow down the “draw in” effect or speed it up and this would generally be used depending on for how long you create the transition.
Longer transitions could use a faster Draw Speed while shorter ones might need slowing down.
The Fade Out Easing is only used on the end of the transition and only when the Fade In option is selected in Nostalgia-O.
The vignette section deals with a built in masking option. By default, it is a screen centered oval (vignette) with an OSC (on-screen control). By using the Curvature control, you can make the oval shape a rectangle (0%).
Dialing down the Dimensions parameter will reveal an X (width *radius*) and Y (height *radius*) options. This slight weirdness is due to the shape control parameters available for the shape I chose to use.
Demo:
Keep up to date with Sight-Creations on Twitter.
A good place to see all of my effects as well as several tutorials and other demonstrations in use is on my YouTube channel.