Custom Fade Designer — expanded control - keyframeless design
The basic idea is to create custom fades once and use Effects Presets to apply them in the future.
With this designer, you can create super-smooth fade transition effects. You can even design the fades to “cut out” and back in. Create a series of fade effects to span your entire clip(s), all without a single keyframe.
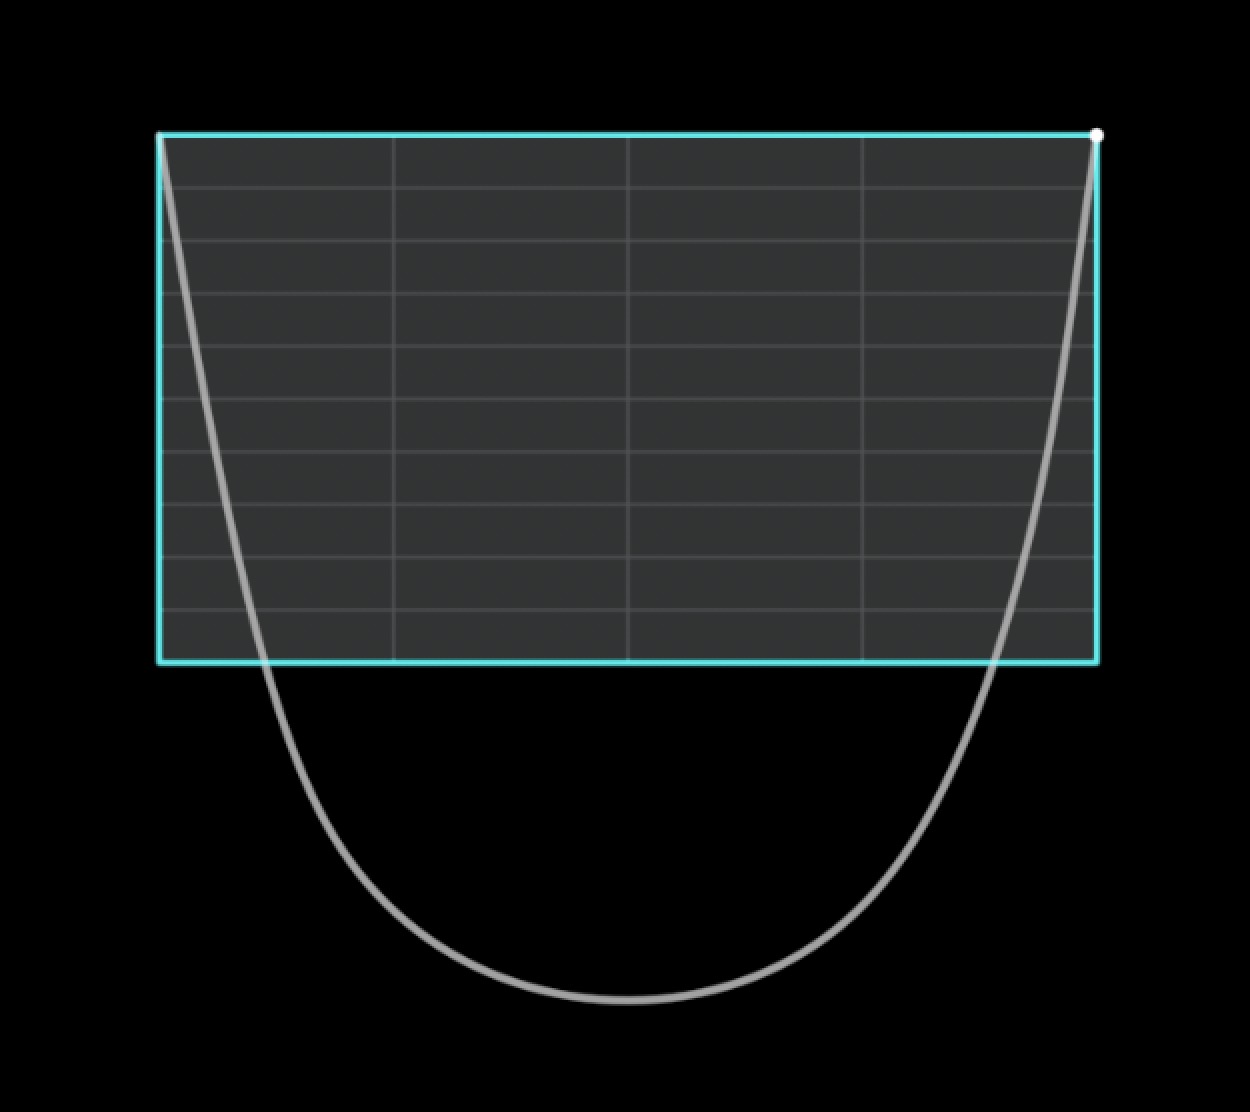
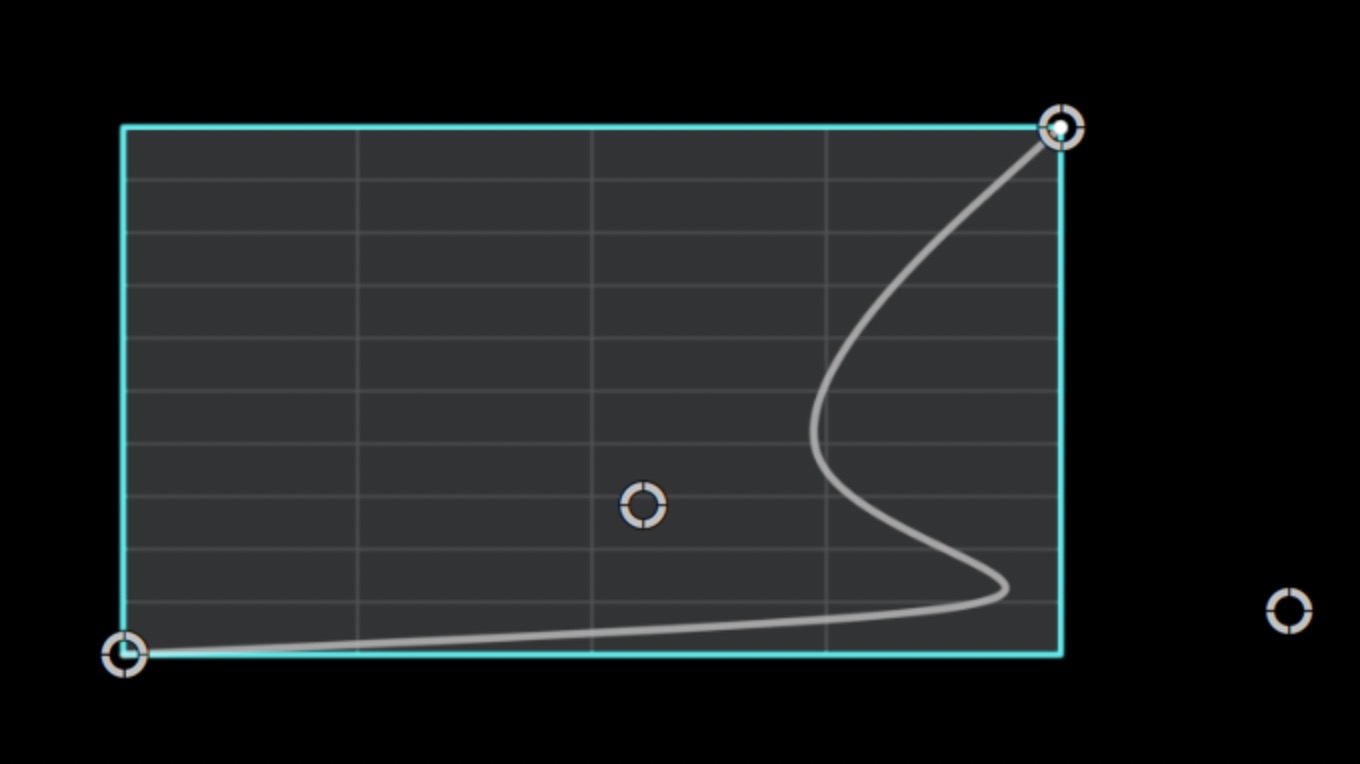
There are four OSC pucks. Just drag them to create your shapes like the S-curve shown on the video demo. Opacity is the vertical level of the line as it “draws” over (horizontal) time.
Drawing the fade line “outside the box” creates cut-ins or cut-outs!
Timing is easily set from within the designer, so multiple fades can be easily created throughout a clip.
The left OSC controls the opacity into the fade (and it persists before the start time) and the right OSC controls the opacity out of the face. It persists as well.
Parameters
Make Live — while you edit, you can turn off this parameter so that the line shape you create will be completely visible. While active, the fade line’s visibility will depend on playhead position and the timing of the fade!
Show Fade Designer will show or hide the onscreen designer panel.
Show OSCs can be turned off to view the work without distraction, but this isn’t all that important — they will not show when playing or exporting.
Scale Designer will fit the workspace into smaller areas, particularly important if you work with Vertical Video, or just want to have the designer more out of the way while playing through the edits.
Position V and Position H can be used to maneuver the designer to different parts of the Viewer. The designer will be restricted to fit inside whatever aspect ratio clip it is applied to (and may require scaling down further to fit!)
BG Overlay Opacity can be used to darken the background a little more for better visibility (or turned off completely — the grid will remain visible.)
In Level and Out Level set the opacity of the incoming or outgoing fade. When designing a Fade Out, these should be reversed to In Level = 1.0 and Out Level = 0 (but values in between can also be used for more advanced purposes.) These two controls (and their respective OSCs) are restricted by time (beginning and end) and Opacity (0% to 100%).
Fade Start (%) and Fade End (%) are set for the percentage of the length of the clip. The absolute lengths will change when applied (as effects presets) to clips of different lengths, but overall, this method seems to be the most practical to use.
A few ideas...
Below are just a few examples of how to create custom fades. The first two are single “application” Fade In/Fade Out and Fade Out/Fade In. The third is a “time distorted” exponential fade in. The last is a “three flash” opacity design.
OSCs shown. Curve outside the top of the panel is 100% opacity for the duration.
The opposite: Fade Out/Fade In — Fade line below the panel is 0% Opacity for the duration.
Essentially an exponential style Fade In with the ascent to 100% slowed further by the bend in the line.
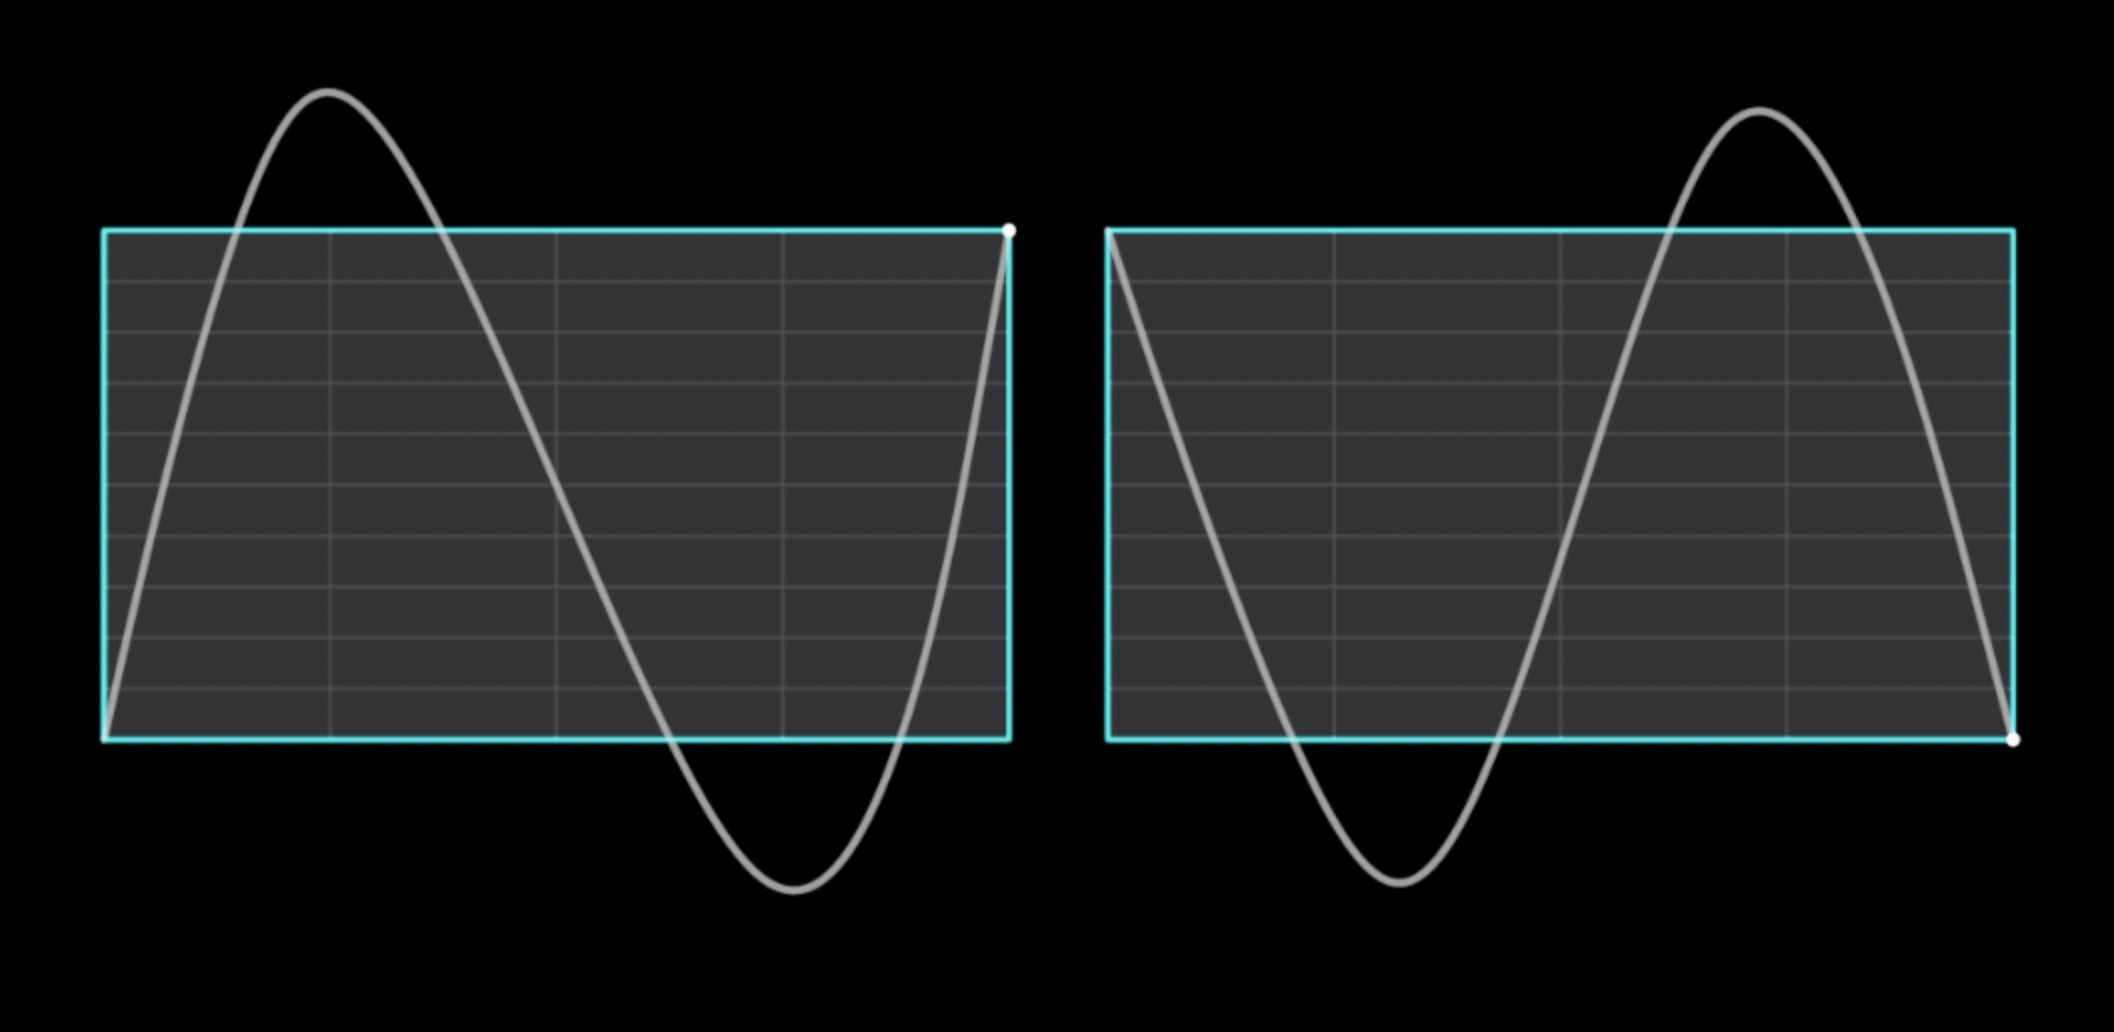
The left is a fade-in-fade-out-fade-in for just less than half the clip. The right is a fade-out-fade-in-fade-out for just less than the last half of the clip. Clip "flashes" three times.