Menu Close

Chapter Time Range

$5.00

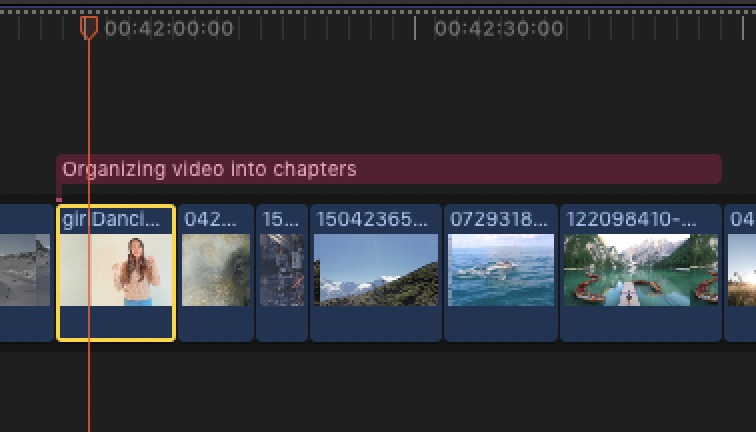
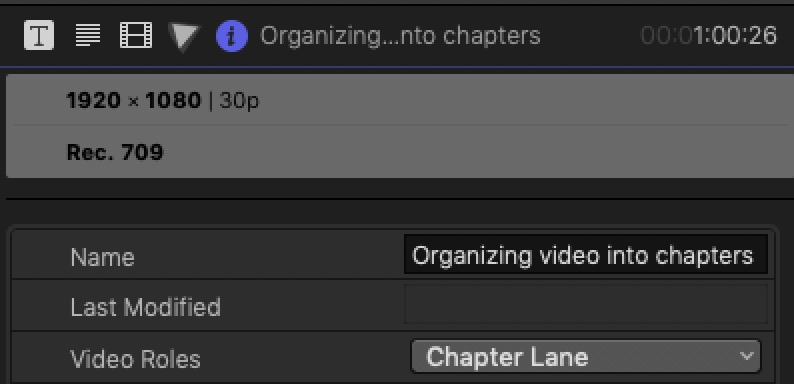
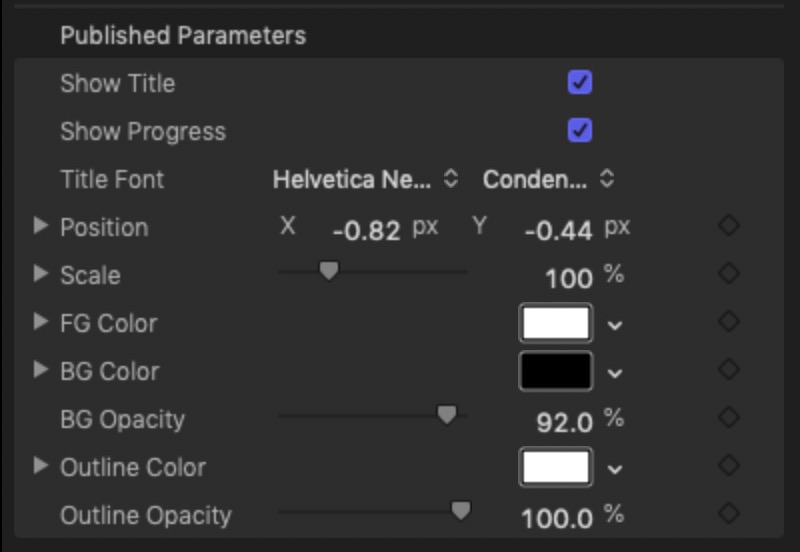
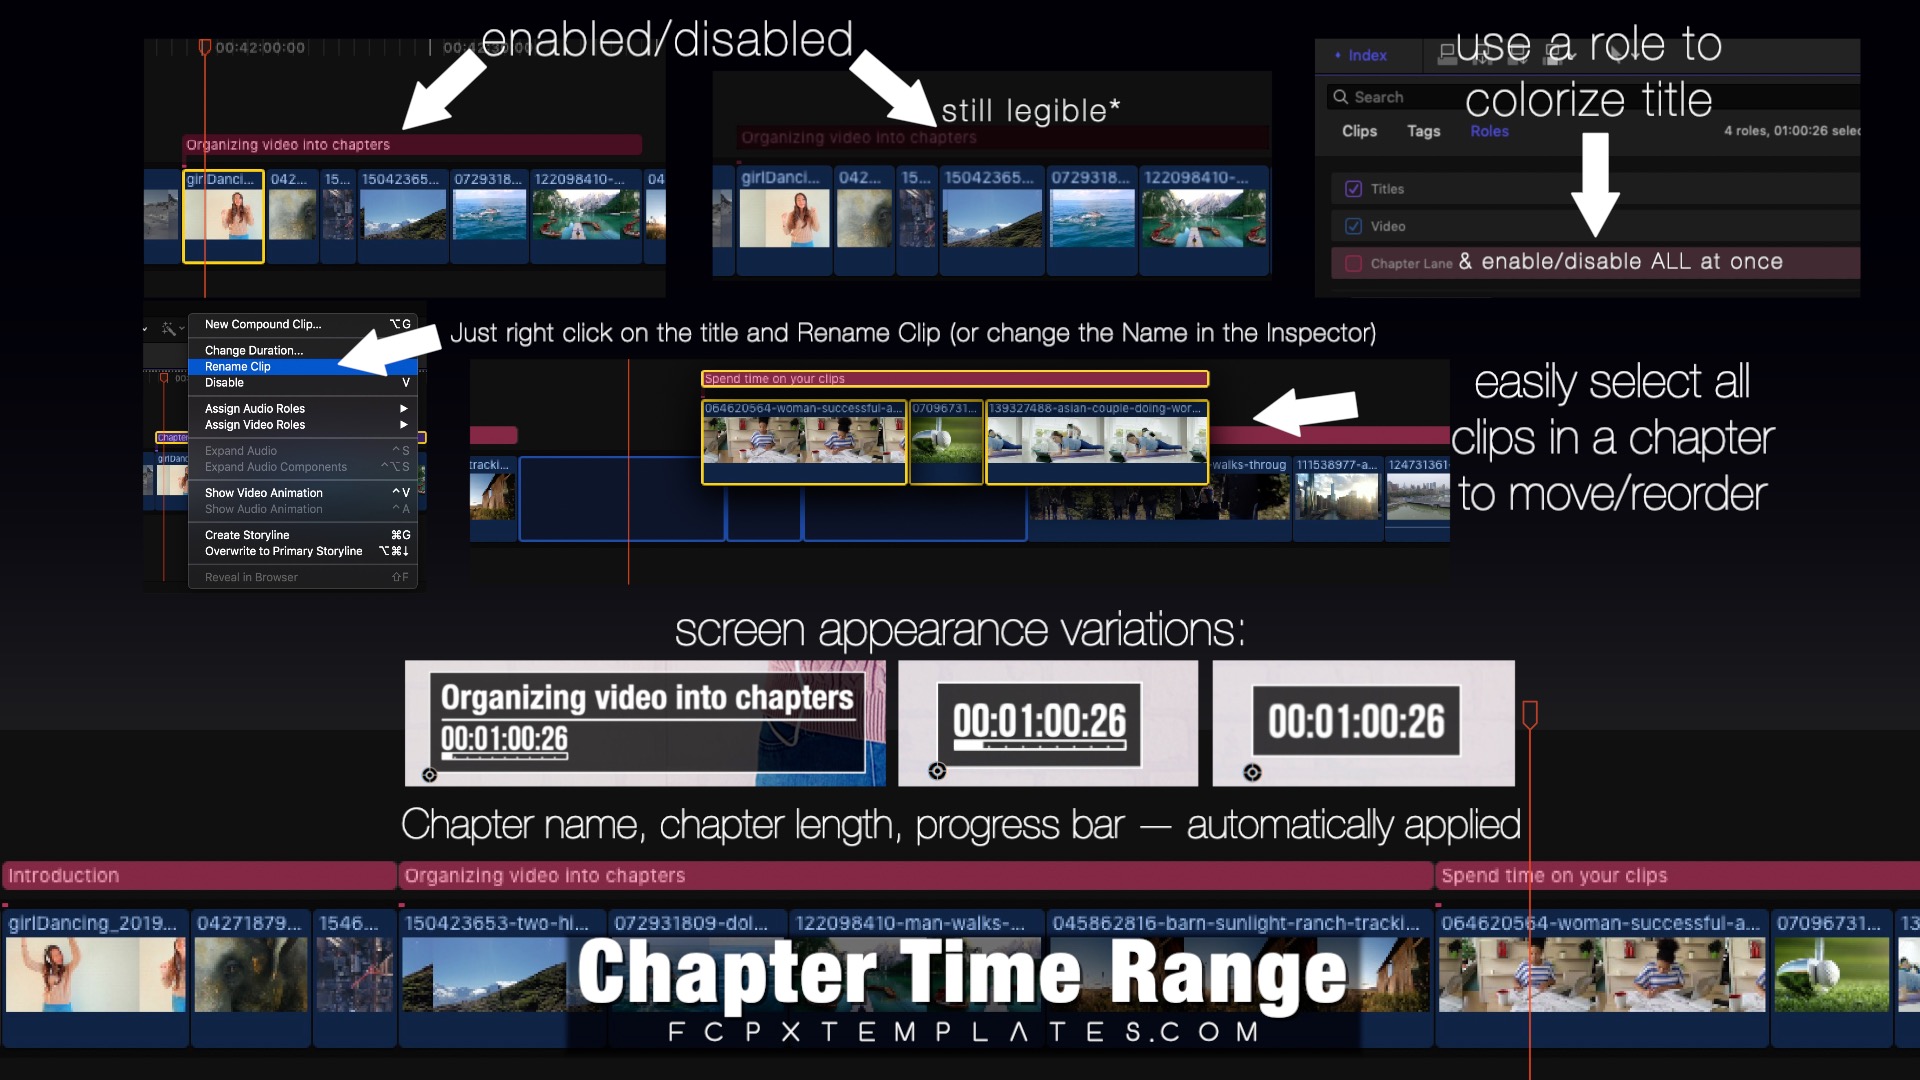
Mark your storyline with Titles to indicate chapters. Easier to see than the standard chapter markers. Rename the title to the chapter title. Time length and progress bar is all automatic, no keyframing!

Requires FCPX 10.4.10 or higher but can be backdated to version 10.3.

Chapter Time Range - Visible UX markers with features

Dual purpose template that allows you to create visible chapter divisions in your work and simultaneously add an optional graphic display in your video with a built in progress bar! Chapter name, time length display and progress are all automatic. The only item you need to change is the name of your chapter.

Titles have a small footprint in the storyline. They’re easy to see, easy to turn on and off retaining your visual chapter information without influencing your project output.


chapter time range - storyline view 1

Apply the Chapter Time Range title to the storyline. If you already have any kind of marker set, you can use snapping to align Chapter Title to the marker.

Right click on the title in the storyline and select Rename Clip from the popup menu. Type in the Chapter name. That’s it. Everything else is set up automatically.


The Title’s name may also be changed in the Inspector using the Name textbox.

The parameters:

The default on-screen view displays the name of the chapter, the length of the chapter and a progress bar divided into 10 “percent” sections. Colors for the background, a border and the “foreground” (text, underline and progress bar) can be customized.

With Show Title turned off, only the time and the progress bar show. The background is automatically resized to fit the new display.

With both Show Title and Show Progress turned off, the chapter length is displayed. Turning off the visibility of the title either by selecting the title and typing ‘V’ to toggle it off, or by using Roles and unselecting the role in the timeline index turns off the Chapter Time display.

Recommendations

The first time you use Chapter Title Range, right click on the title in the storyline and Add Video Role > Edit Roles.

Create a New Video Role and assign it one of the colors to make the Title’s locations more obvious in your storyline. Give the role a name like “Chapter lane” or “Chapters”. Then, for each instance of the Title you add to the storyline, assign it that role.

Having a Role assigned to Chapter Time Range instances will make it easier to toggle on and off from the Timeline Index by unchecking the Role. This way you can easily exclude the chapter information from exports.

chapter time range - assign color
roles editor
chapter time range - role lane
timeline index

Demo/Tutorial

Installation Instructions.

Keep up to date with Sight-Creations on Twitter.

A good place to see all of my effects as well as several tutorials and other demonstrations in use is on my YouTube channel.