SC Headers - title construction kit
The idea behind this plugin is to provide an easy to use custom Title builder.
All you have to do is position 6 rectangles on the screen for two text fields and the texts will move from one to the next.
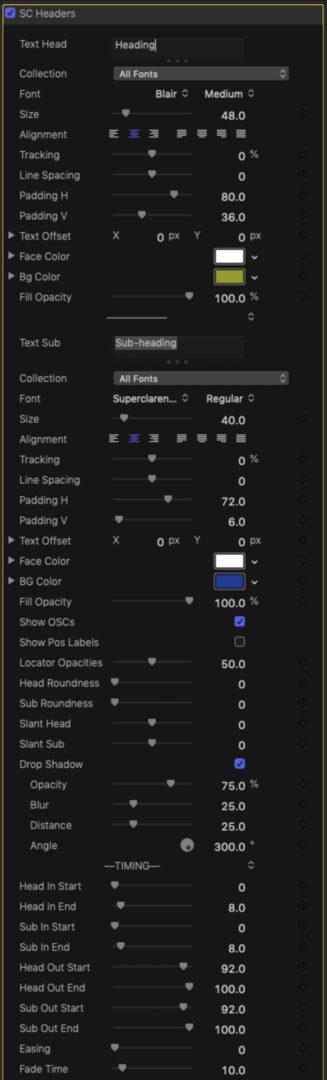
You’re probably noticing there are a lot of parameters. A section for the “Heading”, a section for the “Subheading”, some appearance features and two separate sections for Timing and “Advanced” parameters for custom keyframing or precision alignment values.
Everything is organized for easy access.
For each Text, there is easy access to the Font Collection (if you make use of that feature in Font Book), the Font, Size, Alignment, Tracking and Line Spacing (kerning does not work in this setup… sorry).
Padding H and V are for the background elements to resize width and heights of the rectangle/blocks.
Text Offset for those fonts that are a little irregular in their character spacings (all fonts are NOT created the same!)
Rounding out the actual “title” sections are Face Color, Bg Color and Opacity.
While building your title effect, Show OSCs should be on. The Position Labels option simply applies numbers to the block groups.
Block groups are colored Green (for starting position), Yellow (for the “rest” or “pause” in the animation) and Magenta/reddish for the end position.
The OSC block (a.k.a. locator) colors can only be changed with another effect like Hue/Saturation and normally, they should be turned off when your animation is established.
Locator (block) colors have a separate Opacity control if you decide to keep OSCs turned on.
The background shapes are by default, rectangles, but there are Roundness parameters that can be applied as well as a Slant (±45º angle) applied to the background rectangles only. Slanted text must be italic.
The Drop Shadow control rounds out the Appearance parameters.
Timing
Each text element (“head” and “sub”) has its own independent timing controls.
Head In Start and Head In End are the timing elements for the animation from the Green locator to the Yellow locator. Etc…
All Timing parameters are in % of length of clip. This is why the blank Title “Header Maker” is supplied with this effect.
Animation before and after the “pause” can be “turned off” simply by setting the Start In/Out to 0% and/or the End In/Out to 100%.
A constant animation from In to Out can be achieved by “crossing” over the Start Out and the End In values.
Further, more sophisticated animations can be achieved by keyframing the locator positions in the Advanced section.
Title length will determine how the animations work out and a Title makes this kind of timing very easy and adjustable.
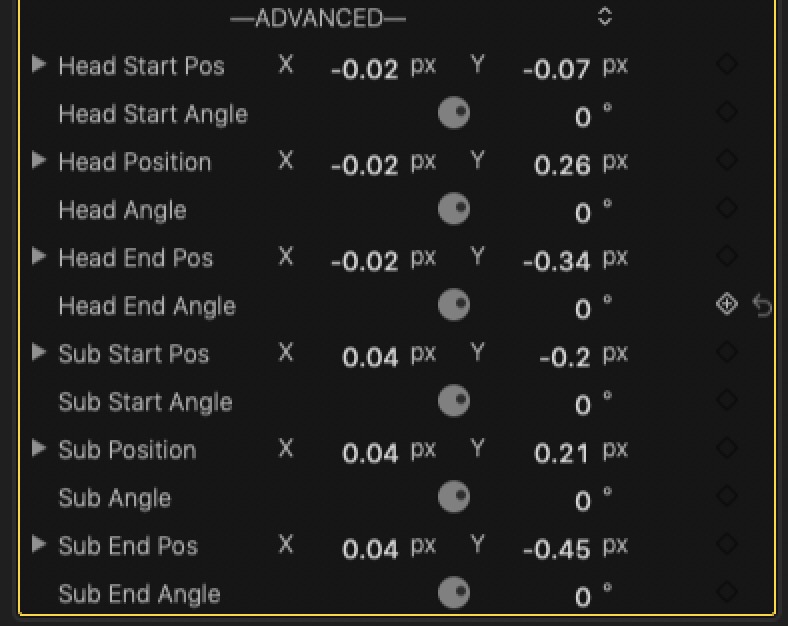
Advanced
These are the Location and Rotation parameters for each of the “Locator”/blocks.
Position parameters **automatically adjust** to the aspect ratio of the media it is applied to. If you develop Headers in Social Media video and want to use the same effect in HD – Headers will work.
You may need to make “fine tuning” adjustments because only the positions are adapted, not the width of the texts you save with a preset.
Rotations are “additive”. You have ±720º rotations available with each angle parameter, but the transition from one location to another can be combined with the rotations of each phase.
Parameters
What to do with your design
Once you’ve “mapped out” your perfect animation, click the Save Effects Preset button at the bottom of the Effects Inspector column.
Give your Title a name and a Category to be placed in.
Any time in the future when you want to apply your title animation to another clip or project, instead of selecting SC Headers, simply apply your saved Effect Preset version.
Final Cut will load your masterpiece already made onto your clip, title or generator… and since it will automatically adapt to whatever aspect ratio you require, you will never have to rebuild it from scratch.
Just apply your new header texts, make any necessary tweaks and you’ll be good to go.
Notes:
This original effect was designed with two specific fonts that are installed with Final Cut: Blair and Superclarendon.
If you change the fonts, when you edit the onscreen controls/locators, you may notice changed fonts will not immediately follow or stick to their locator or background. This will be immediately remedied by moving the playhead.
(I don’t know why FCPX is this way… but what can you do?)
Demo/tutorial:
Keep up to date with Sight-Creations on Twitter.
A good place to see all of my effects as well as several tutorials and other demonstrations in use is on my YouTube channel.