1 UP Corner
1 UP Corner is designed as a Final Cut Pro X Effect for ease of use. Just apply one instance to separate clips, pick the corner you want to place your clip in and it’s automatically placed seamlessly without having to use parameters and/or keyframes. No scaling involved. Since 1 Up Corner is an effect, a Ken Burns effect can be applied to animate the effect, either from full screen to your chosen corner, or from the corner back to full screen. If the media used is the same aspect ratio as the FCPX project, then the fit into the corner is perfect. If you opt to use other format media within a different aspect ratio, then a Scale parameter has been provided to help fill any gaps that might appear. The Scale parameter can also be keyframed from 0 to fill the space over time for effect. A “border” for clips has also been provided. The border is simply solid lines passing through the middle vertically and horizontally. Border color (and opacity) has been provided.
1 UP Corner has been designed to work with all aspect ratio projects provided by default for Final Cut Pro X. Aspect ratios supported by FCPX are: 16:9 (1.77777…), 4:3 (1.3333….), 1.316, 1.896, and 2.0. You don’t have to worry about which aspect ratio goes with which project size, this template will be automatically adjusted to fit whichever project size you choose.
Basic Use:
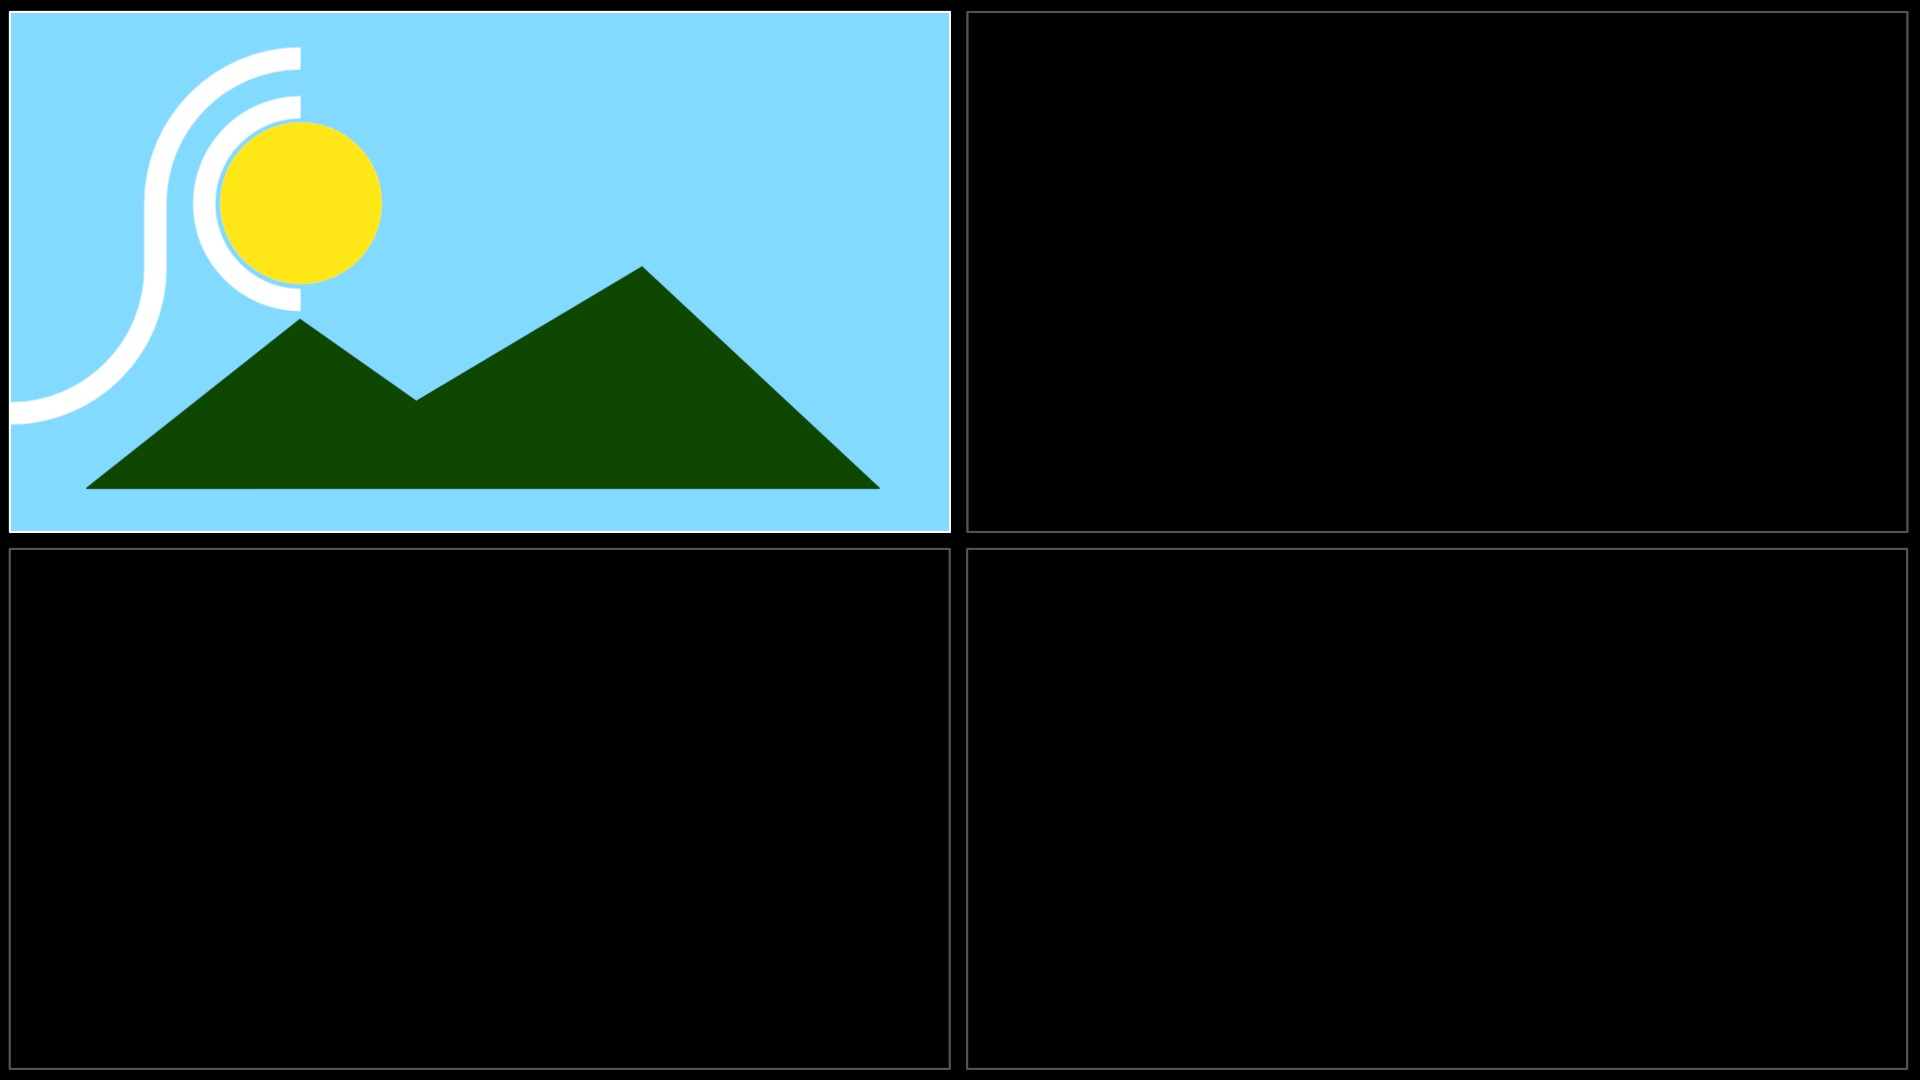
Drop 1 UP Corner on a clip. By default, it will fit the clip in the upper left quadrant of the frame. To make a “4-Up display”, stack 4 clips on top of the storyline (they can be staggered to delay their effect.) There is a drop down menu to select which quadrant to place the clip: Upper Left, Upper Right, Lower left and Lower Right. It’s that simple. From 1 to 4 clips.
If you need border lines, they have been provided. You should simply use the topmost clip to add the lines to the scene. The default width is 0 which is no line at all. Any width can be set, but to reset the width to 0 you will need to click and drag the number value in the inspector downwards (or double click the value and type in ‘0’).
A color parameter has been provided for the lines color, and clicking the Border Color disclosure triangle will also reveal an Opacity parameter. Lowering the opacity on a 1-pixel wide line will make it look even thinner.
Animation:
The most simple animation is to keyframe the Scale parameter from 0 to 100% (some variance may be necessary if the clip’s aspect ratio does not exactly match the project frame size.)
Animating from Full Screen or to Full Screen:
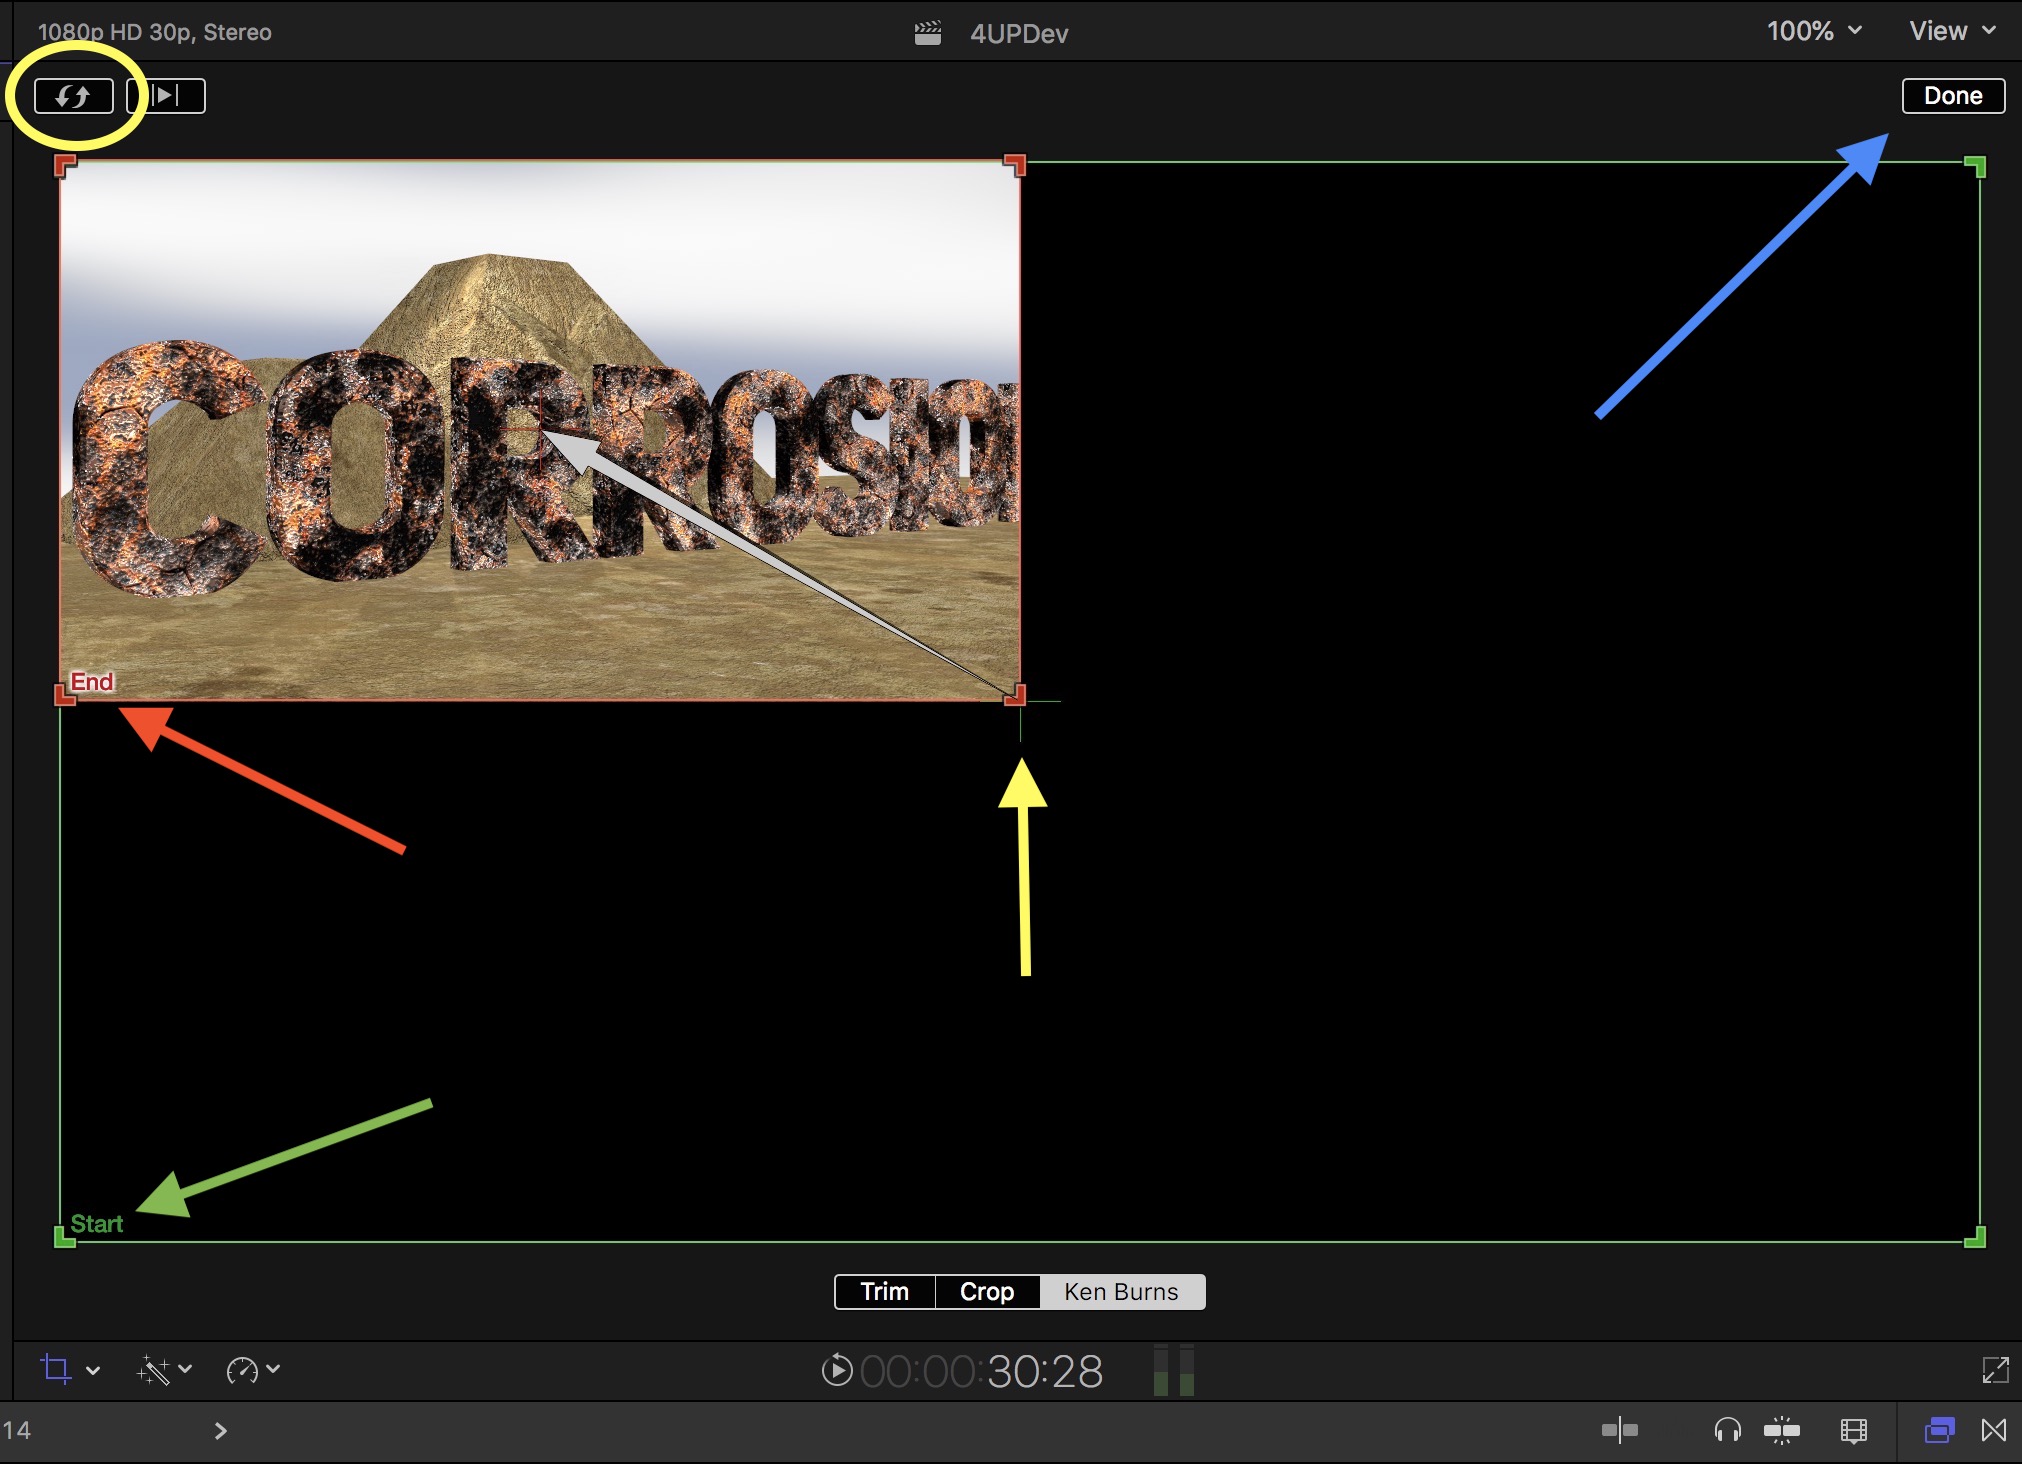
Using the built in Ken Burns cropping effect works exceptionally well with 1 UP Corner and it’s very simple to do. The default Ken Burns already has one rectangle (green – Start) at full screen size. The red (End) rectangle is the destination of that animation. Simply fit the red Rectangle around the 1 UP Corner clip position (click Done! [blue arrow]) and play. To change the direction of animation, simply click the reverse arrows (yellow circle). [Note: there is a center “crosshair” available for locating the center of the screen/frame.]
1 UP Display is an extremely easy to use effect. There’s plenty of flexibility and room for experimentation and variation. It’s even possible to use the effect to place text in the four quadrants. It can also be used, by doubling the effect, as a 16-up display (or 4-4 up displays in their individual quadrants.) To use this effect doubled, the determining effect will be the bottom version in the Inspector. The upper version is used to determine the placement within the selected quadrant of the lower instance. Example: apply 1 UP Display to a clip. Set the quadrant you want to it to appear in the smaller version. Add another 1 UP Display and set the quadrant you want the upper effect to appear in.
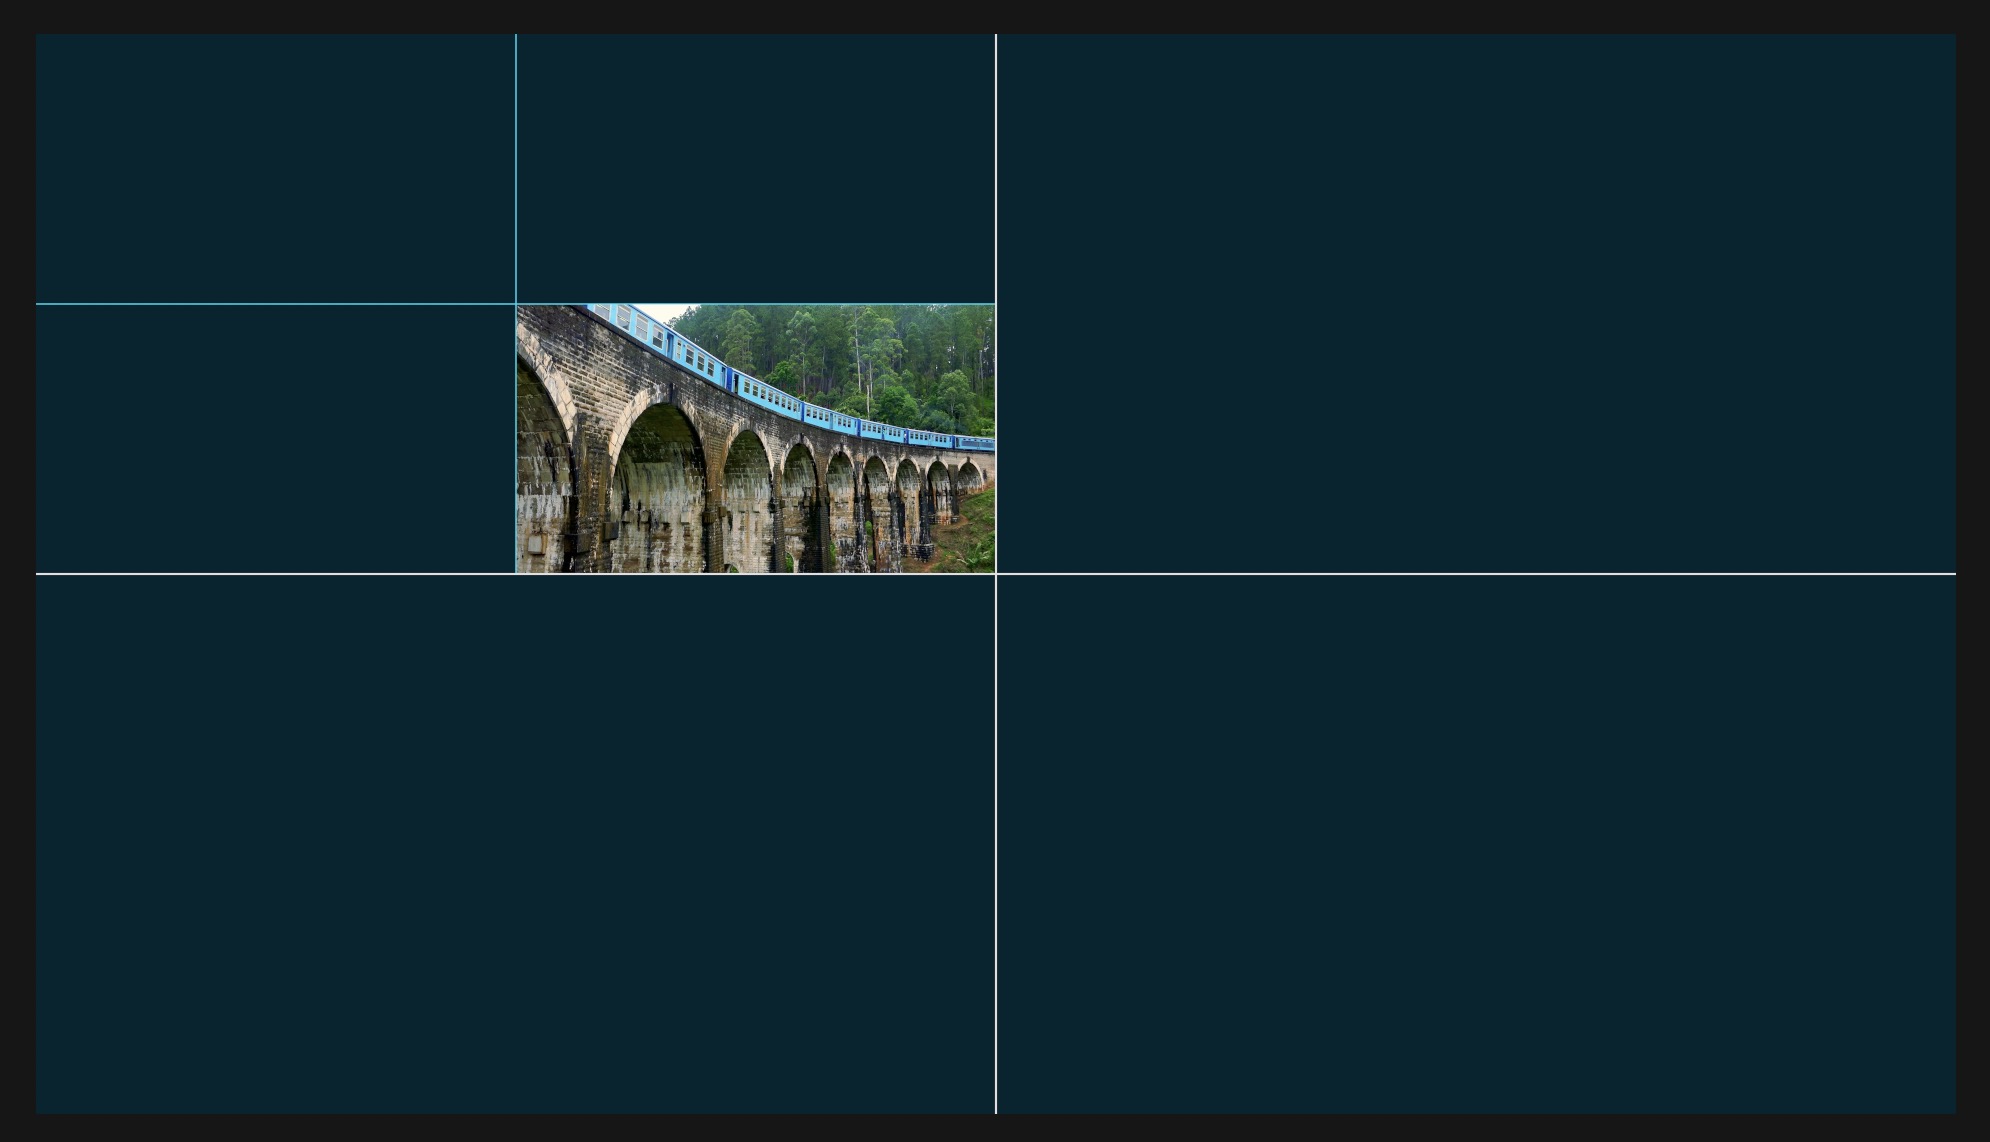
The first added 1 UP Display effect is shown using the cyan border lines. Once set up, applying the second instance of 1 UP Display will move the entire previous effect into the quadrant of choice. The above is using Lower Right for the first instance then Upper Left for the second instance. The clip is 1/16th frame size and perfectly positioned with its lower right corner on the center of the frame.
Using with a Title:
Make sure the text is centered in the viewer (it should snap to the center when dragged near it.) Make sure the text is twice the size you want it to appear (it can be adjusted afterwards!) Apply the effect directly to the title and select the quadrant in which to place it.