Tag: generator

Puzzle HD User Guide

Puzzle HD User Guide

Puzzle HD User Guide

Puzzle HD is a Generator template and requires the installation of the ZZSCPuzzleHD-Regular truetype font (included). Simply open Font Book and drag the font into the font list column. If Final Cut is running, you will need to restart it so that it updates its font list.

Puzzle HD does not animate on its own but only needs one parameter keyframed to animate the effect to your liking. This method allows for “freeze frame” animation for effect. The puzzle can be resized, moved and rotated in space. It’s very easy to use. An optional puzzle board background (wooden texture) is provided.

Keyframe example

puzzle hd keyframe example

The yellow/orange diamond demonstrates an active keyframe. It only appears yellow when the playhead is resting on the frame on which the keyframe is set. Below the yellow/orange diamond is an unset keyframe (default). When you mouse over an unset keyframe, FCPX shows a tooltip to “Add a keyframe”. The curved arrow on the right side is a “reset” button (which will clear all keyframes and reset the parameter to its default setting). Not shown are left and right facing arrows that appear when the playhead is on either side of a set keyframe which can be used as a shortcut to set the playhead on the next or previous set keyframe. You can have a keyframe set on each frame (possible but not practical). FCPX will interpolate parameter values when the playhead is between two set keyframes.

Puzzle HD is animated by the Piece Location parameter. The default is set to 100% (fully assembled). The 0% value is a completely disassembled puzzle and more often than not, all the pieces will be off-screen. To see how this works, go down to the Puzzle Rotation parameter and dial open the disclosure triangle on the left edge of the parameter. Change the Y parameter to 45º.  Adjust the Puzzle Scale down to 80%. Adjust the Active Pieces parameter to 10 or so. Slowly drag the Piece Location parameter from 100% down to 0% and watch the effect. Move Piece Location back and forth a few times. That’s the effect. You set the timing, you set how far puzzle pieces are placed (with or without animation!) Everything else is customization.

Puzzle HD Parameters

Active Pieces

This parameter determines how many pieces will become animated with respect to the setting of Piece Location. A setting of 0 will move only one piece at a time from its beginning location to its end location, then move the next piece until its completion.  The higher the value, the more pieces will be moving at the same time (but still like a “race” to the finish, you will still see a starting order).  The slider goes to 100 (there are only 35 pieces of the puzzle), but you can click on the number value and drag it up to higher values which will compress the travel distances over all the puzzle pieces the higher the value.

Variance

This parameter introduces more random motion but not in position, but XYZ rotations. Cranking this value up will get the individual pieces spinning around like “crazy”!

Method

There are three animation methods: 1) Random (this is the default — pieces animate in random order); 2) By Single Column — this will cause the pieces to animate by “column” (left to right going from 0% to 100%); 3) From Ends to Center — this will guarantee that the last piece to “fit” will be the center piece (or conversely, the center piece will be the first to move out).


Random Seed

This is changed by clicking on the circular opposing arrows will generate a new random value. This value affects Variance only.

Piece Thickness

This parameter determines the thickness of all the puzzle pieces. This puzzle is created in real 3D and the back sides are textured as cardboard. The default value of 10 works best in general, but you can decide for yourself how you want pieces to appear. Since the puzzle does not require animating, the freeze frame appearance may need a different look.

Front Edge Size

Another 3D look option. There is a disclosure triangle, however, this parameter may already be open by default. The actual parameters that mater are Width and Depth. When Width is 0, you should have a seamless image. Keyframing this value from any positive value down to zero will transition the appearance from puzzle to normal video(/image). The Depth is the vertical (in 3D, this direction is towards the viewer) distance of thickness of the “edge”. These values are completely separate from the Piece Thickness value.

Show Board

This generator has an optional wooden puzzle board. This parameter is set on by default. You may uncheck the parameter to hide the puzzle board.

Puzzle Position

The location of the puzzle in the viewer. Dialing open the disclosure triangle reveals a Z position parameter which matters (and is different than scale although it can be used in much the same manner!) The XYZ parameters can be keyframed to animate the puzzle in your scene.

Puzzle Rotation

These parameters, like Position, may be keyframed to animate the rotational orientation of the entire puzzle.

Puzzle Scale

This parameter is a useful shortcut to resizing the appearance of the puzzle in lieu of manipulating the usually hidden Z position parameter.

Drop Zone

This is filled, by default, with a custom drop zone (which forces the aspect ratio of the media dropped to 16:9). This is a standard Final Cut Pro drop zone otherwise. If correction is needed the following Pan and Scale parameters can be used to make adjustments and/or corrections. Fill Color is used for a background in case of any media with an alpha channel (transparency). Puzzles don’t usually come with holes in them!

Shadow Opacity and Softness

Each puzzle piece casts a (3D) shadow. This effect is not the usual “drop shadow” used for everything else in the user interface. Shadow Softness can be used to take the edges off… so to speak 😉


Keep up to date with Sight-Creations on Twitter and Facebook.

A good place to see all of my effects as well as several tutorials and other demonstrations in use is on my YouTube channel.

Hinged CRT - LiveType TV LiveFont Revisited

Hinged CRT User Guide

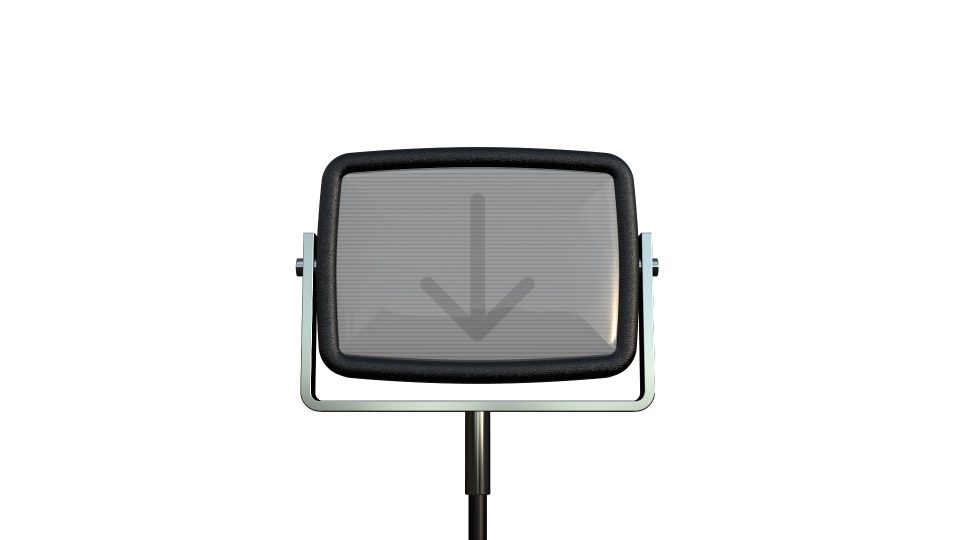
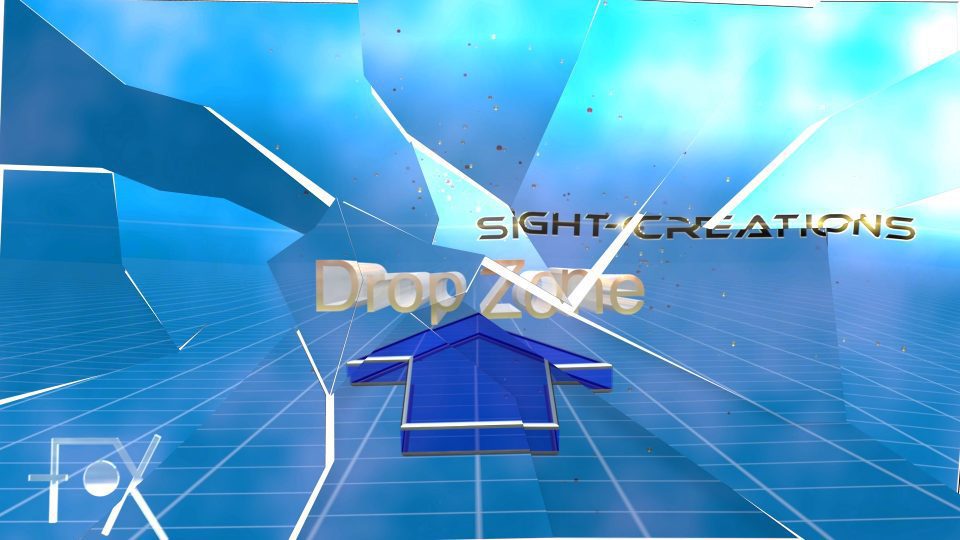
Hinged CRT Generator

User Guide

I want my LiveType® TV!

This is not a complicated effect. It’s basically a drop zone with window dressing. This effect requires the installation of a special font used to create the 3D text effect graphics (included with the plugin download).

This generator is auto animated via the optional Build In and Build Out parameters. The Build In animates the CRT up into view with a turn (just like the original). The Build Out turns the CRT and pulls it back out of the scene. There are other controls that can be keyframed to customize animations however you like and they can even be used to supplement the default animations.

There are sixteen default animations, eight standard and another eight with the turn direction reversed. CRT is animated from scene edges (top, bottom, right and left) and the Long descriptor means horizontal orientation of the CRT while Tall means vertical. The turn for all orientations is screen up to face front. The turn, if Change Direction is checked is screen down to face front.

Hinged CRT Modes
Build Animation Modes

First trick:
Set up the Hinged CRT generator as if it were a completely finished effect including all keyframed animations. Blade through the middle of the generator (all keyframes will remain intact) and change the Build Out animation to move in the opposite direction by selecting the Change Direction checkbox.

Parameters:

Hinged CRT FCPX Plugin Parameters

The Zoom slider will increase the size of the CRT to slightly larger than 1920 x 1080. For larger format media, use the Video Inspector Scale All parameter. It will still look great!

The Horizontal, Vertical and Rotation Offset parameters can be used to customize animations, even the Build In/Out animations already in progress! Rotation reorients the entire Hinged CRT model, not the CRT in the hinge mount.

The front screen “glass” effect looks a little lame… due to the nature of 3D surfaces in Final Cut, there’s not much that can be done. A Reflection Amount parameter has been added to help reduce the otherwise sharp edge effect in the glass. Another technique to disguise its appearance is to rotate the CRT about -7º to shift the shine slightly and smooth out the edges.

The next section of parameters deals with the Drop Zone. Select the Drop Zone source well and FCPX will present a “two-up” display in the Viewer. Select your source media from the Event browser. If your media is to be video, then as you mouse over the video in the Event Browser, the cursor will change to a pointing finger and you should see a skimmer bar. Keep an eye in the viewer and where you click on the Event thumbnail will select your first frame of video to be used. If choosing an image? It doesn’t really matter where you click.

The Drop Zone can also be filled with any kind of video you create in the storyline. You can combine video, photos, titles and generators just as you would for your normal video presentation. Bundle all the pieces to be used into a Compound clip and select the starting frame from your compound clip right in the storyline. Once you fill a Drop Zone with media in the storyline, you may simply delete that media from the storyline and the drop zone will retain what was placed in it. This is especially convenient if you need to simply place Title text in the CRT without having to make a compound clip. Once loaded, reuse the title for another instance of Hinged CRT or simply delete or “hide” the title (typing the V key on any kind of selection will toggle its “visibility” [or turn on/off audio as well.])

There are Pan and Scale controls to help align and/or fit video into the CRT screen. You may also changed the background color of the dropped material (e.g. text) with the BG Fill Color. The color selected will appear slightly different due to the design of the 3D model. Color “richness” can be compensated with the Contrast, Brightness and Gamma controls at the bottom of the parameter list.

Bad TV options are on be default but minimally used (scan lines). Unchecking Bad TV will present a “straight” media image with no “old TV” effects.

Waviness is a good way to provide “glitch”. Keyframe a jump into Waviness to last about a second and jump back out (reset to 0).

Roll is best used by setting from one extreme and keyframing to the other depending on the direction of the roll.  That action will give two “flips” through the image and looks convincing even when the Drop Zone media is scaled down (creating a rather large border between the two rolled images).

Static, like waviness, is best used in moderation, but the choice for all of these features is yours!

Reducing Color Sync will give the image color edges (faded red and cyan – probably looks somewhat “cool” with red-cyan 3D glasses :D).

Old TVs were very “flexible” in their display of onscreen images — the Saturation control can help with that little bit of realism as well.

The next three parameters deal with scan lines. You really have to play with them in conjunction with each other. The number of effects achieved cannot be enumerated here.

And last, the previously mentioned Contrast, Brightness and Gamma Controls. These can be used to adjust the actual dropped image in the Drop Zone.


Have fun!

[LiveType® is a registered trademark of Apple, Inc.]


Demo video:

Keep up to date with Sight-Creations on Twitter and Facebook.

Shatter Generator for FCPX by sight-creations | FCPXTemplates.com

Shatter 3.2 User Guide

Shatter 3.2 User Guide

Shatter 3.2 is a “break-out” effect simulating breaking glass. The optical effect is created by a specially crafted font with exceptional precision and using 3D Text to take advantage of very realistic lighting effects. It will be well worth the effort to get to know this Final Cut Pro visual effect in order to get the most out of it.

Shatter 3.2 requires the installation of a provided font (ZZSC Shatter Glass-Regular.ttf). User Font Book to install into your User collection, or create a custom collection for the font. You must restart FCPX before it will become available.

By itself, Shatter does nothing. It requires interaction. It can be used as a still effect, or it can be animated.

Looking at the parameters, there are five groups:

The top portion is the drop zone, transform parameters and a Thickness parameter. The shatter effect utilizes “real 3D” and requires installation of a specific font (supplied with the effect and requires installation before using in Final Cut.)

The next group are the Travel Parameters. These are the primary parameters for animating in Final Cut.  The next group are the Animation Options which can be used to set up the ranges of the “travel” in 3D space. The next group allows you to randomize how the animation occurs. The last group allow you to customize the look of the drop zone media making it appear either solid or transparent. The real 3D features of this effect also provide for light reflections as well as an environment reflection.

In the beginning, the most important parameters are the Travel Parameters. They determine the movement of pieces in straight line Z, rotation amount, and gravitational pull. The Shatter effect has two built in methods of fading. The gravitational motion fade is automatic and cannot be overridden (except by increasing the Gravitational  Distance parameters to a larger amount which delays where the onset of decreasing opacity comes into play.) There is an optional Z Distance End Opacity that is tied to the Z Distance Travel %. It does exactly what it looks like: animates the opacity of shard pieces over the distance traveled. At 100% travel, the pieces will have the opacity set by this parameter.

With Shatter installed and available in Final Cut, add it to the storyline either in the storyline by itself or over another clip. The default look is a custom Drop Zone image that comes with the effect. Leave it for now.

The first thing to do is move the Z Travel Dist. % parameter. This parameter moves the shatter pieces from 0 (default) to Maximum Z distance by percent (max Z can also be a negative value — the pieces will move away from the viewer instead of toward). Move the slider slightly and observe the behavior. Reset the slider and do the same with Rotation Amount. Like it? Now move the Gravitational Travel slider slowly.  These will be the three main parameters you will most likely animate, although you could choose to animation only one for a particular effect.  The Z Travel Group size determines how many shard pieces move “together” at roughly the same time. The default is 250 to get them all moving more or less immediately. Setting this to 0 will make a piece “pop off” and travel immediately to its end position. A setting of one will look more natural as one piece appears to move through its travel space at a time, and so on.

Keyframing in Final Cut is quite easy. I’ll leave that information to other sources if you need help.

There are randomization controls so that you can change up which pieces behave which way at any given time. The Randomize controls sport a “yin/yang” set of arrows. Simply click on that small icon to change the parameter value. The Variance controls determine how much random difference is employed. (The Gravitational Variance does not have this control – just a random value.) The Z Minimum Variance has a value range from -100% to 100%. Using the slider will stop at 0 on the minimum range, but you can click and drag down on the number to take it down to -100. Rotation Variance stops at zero using the slider or click/drag.

The final section, Glass Properties, will probably be the most difficult to use (and to explain!) The default values should give a good approximation of what the original clip should look like outside the Shatter effect with the exception of a slight reflection of the “environment” on the image. All of these parameters can be keyframed to control how they behave over time (not that anyone is likely to, but it could help out if you care to learn about them.)

Glass Properties

Reflective Light. A bit of a misnomer. It is a compound “effect”. Dial down the disclosure triangle to reveal Lights and Environment.  If you dial down Environment to zero, you can eliminate its reflected effect on your image completely. The Lights control can be used to control shadows that you may want to appear in your animations or displacements. These parameters are capable of very large number values if you click and drag directly on the numbers.

Surface Shininess determines a more “glass-like” reflection as it approaches 100%.

Surface Blend is the amount of the image blended into the surface reflected light. At 0% (no blend) you will barely perceive much of your image.

Environmental Intensity is the amount of the Environment (allowed by Reflective Light > Environment) that is “infused” into the image.

Env. Contrast: increasing this parameter to large values will “clarify” the “reflected” environment with the image. Reducing this value towards 0 will blur the environment effect in your image.

Saturation is the amount of color value infused with the reflected environment.

Material Opacity is the opacity of the image in the shard character. Dialing this value down is how to a achieve a more transparent glass-like look.

Refl. Img Brightness is the best way to compensate for the “fade” induced by Material Opacities less than 100%.

The accuracy of the descriptions of “Glass Properties” is not 100%. The explanation of each parameter is beyond the scope of this document. The explanation of “behavior” is more a less a guide for your use of the parameters. Feel free to “play with” their interactions. You can always reset all the parameters to their default values by clicking the reset button on the far right edge of the parameter’s cell that becomes visible as you mouse over the parameter.

Demo:

Installation Instructions. (Shatter 3.2 is a Generator.)

Keep up to date with Sight-Creations on Twitter and Facebook.

A good place to see all of my effects as well as several tutorials and other demonstrations in use is on my YouTube channel.

Solari Strip feature with SC logo

Solari Strip User Guide

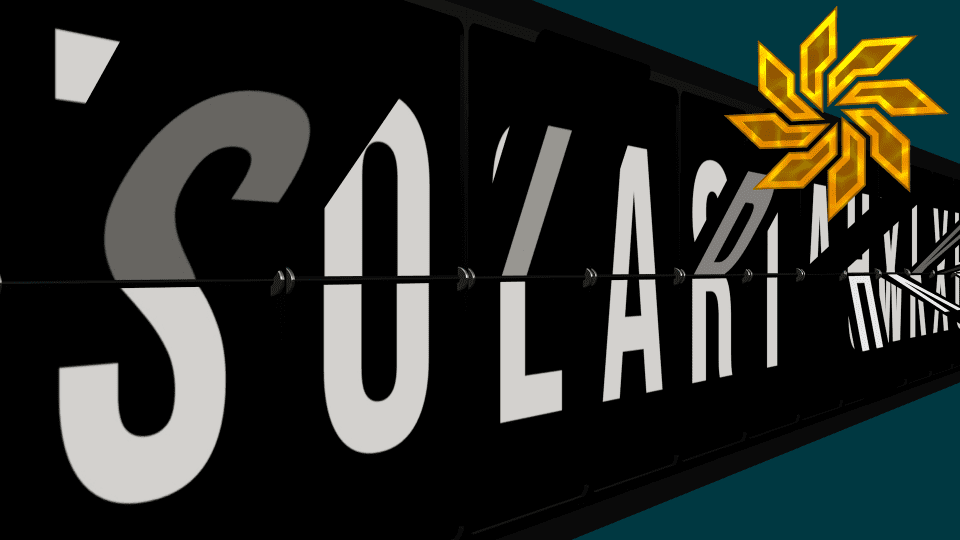
Solari Strip User Guide

A Generator for FCPX

Solari Strip is a “real” 3D effect. The Split-Flap animation is built with actual 3D modeled parts. The effect can be moved around in 3D space and still have a consistent “look”.

Solari Strip is an easy to use generator. It features 14 Solari (or split-flap) character sections. Each section is limited to the characters A-Z and numbers 0-9 with spaces between the groups. An added feature is the ability to turn each split-flap character on or off to make creating layout “patterns” possible.

Solari Strip requires installation of a font: ZZSC Flipboard Parts provided with the download. Use Font Book to install the font. The font name starts with “ZZSC” to drop the font to the bottom of your font menu and out of the way of your regular fonts.

Published Parameters

This is a partial list. The SLOT # CONTROL sections are the same for all 14 split flap sections.

At the top of the inspector are the Position control in the scene. Position, Rotation and Scale plus the color of the “Back Panel”. Before releasing, a few other parameters have been added. They are:

Back Panel Opacity — it is possible to fade or completely turn off the back panel which is an effective way to make the Solari characters look as if they are part of the storyline background.

Back Panel Width — it is possible to turn off individual Solari characters in order to create your own formatting. For example, you need 2 slots for number and 7 slots for characters. You can adjust the width of the Back Panel to span just the 10 characters used (including a “gap” character).

Back Panel X Offset — allows you to align the Back Panel to any section or subsection of the solari characters.

Each Solari Strip generator will have its own OSC (on screen control) to allow you to easily position the strip in the Viewer.

SLOT CONTROLS

All Slot Control sections are the same for all characters.

Each section control is a menu to toggle on or off that “slot’s” solari (or split-flap) character. Turning off the character will leave a blank space.

Move the playhead to the beginning of the generator to set the Starting Character (Start Value), then move the playhead to the end of the generator to set the Ending Character (End Value).

The Start and End Offset parameters determine the (video) frame offsets from the beginning and end of the generator that animation begins and ends. You can completely customize how the characters change with these parameters. The default length of the generator is 300 frames. “Crossing” the start and end values will effectively freeze that Solari character to the End Value. Setting the Start Offset to 300 or more will “stick” the character at its Start Value.

The character sets (A-Z 0-9) loop so the starting and ending (Value) numbers can be just about any positive value. Please see the accompanying PDF file for number/character associations. This is a looping effect and to give the illusion of very fast action, you could set 2-3 spans of entire character sets before landing on the ending value.

If you set the Start Value to be a greater number than the End Value, that Solari Character will run “backwards”!

Recomendations

Do not set the Start and End Offsets to 0. Give the reader a second or two to see the first set (Start Offset = 30 to 60). 

Vary the Ending times a little so that the flaps do not all finish at the same time (not very “real-life”).

Notes

Viewing the panel of character from behind, although possible, will look rather strange (only the “face” of the effect works as expected). This is why the Back Panel was provided. Use it if animating the Strip in rotation.

The Back Panel is simply a flat (no beveling or other styled corner) surface with depth. Lining up several generators will make a seemless surface even when overlapped (provided the Z-positions are exactly the same).

If you create a scene with several simultaneous instances of Solari Strip, be prepared for a rather long render time (on the upside: it will be worth it!) If placed in scenes in your movie that require further editing, consider “baking” the Solari Strip effect with transparency (ProRes 4444) and bringing the exported movie back into FCPX for application in your scene(s).

Even with one strip, rendering will be somewhat lengthy (depending on your Mac’s specifications).

Demo video:

Installation Instructions.

Keep up to date with Sight-Creations on Twitter and Facebook.

A good place to see all of my effects as well as several tutorials and other demonstrations in use is on my YouTube channel.

Apple Watch 3D Model

The Apple Watch 3D Model that wasn’t released


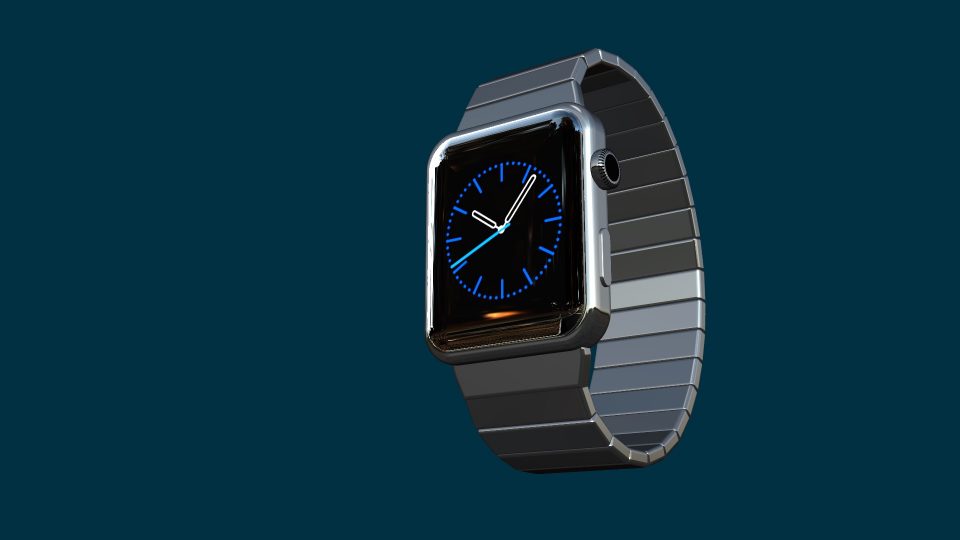
Developed in August 2015 but never released.  Why? Apple never made the San Francisco system font available to other applications (system only) and the fonts are only available to those who have an Apple Developer account. Furthermore, developers could only use it for interface “mock ups” (although this model might qualify).  The Mickey Mouse watch face would have never been included because it  is © (and trademarked) by the Walt Disney Company… probably forever.

This model’s features:
built in clock display (which runs fast – it’s just a demo)
front “glass”
animatable position/rotation parameters
animatable dial/crown rotation
animatable button
drop zone w/Pan and Scale parameters
drop zone position and rotation parameters to animate turn effect
clock position and scale (in case of repairs!)
glass reflection intensity control

I developed a generator to go with this model:
https://www.youtube.com/watch?v=3dZ7560xcUc (dated Aug. 29th, 2015)
which is a frame accurate, settable and customizable watch.

The second half of this watch demo (the activity monitor) was another generator I created for the watch drop zone (also not released).

The state of this watch model/Motion template is in limbo.

I may develop the text font for this clock myself when (or if) I have the time as a substitute to the required version of San Francisco used in its making.