EZ Track 3D — Exercise 1
There will be two exercises that will demonstrate the usage of this effect. This exercise uses the following practice clip:
In FCPX, create a new Project (1080/30p) in an Event. You can simply drag and drop the clip directly to the storyline — the clip will automatically be added to the currently active Event. It should be placed at the beginning of the storyline to make this exercise easier to follow.
Add the EZ Track 3D title to the clip. With the EZ Track title selected, type 15.09 into the Timecode clock and type Enter. This will set the timing length to 15 seconds, 9 frames long. If snapping is off, hold the N key as you drag the title to the right until it snaps to the end of the clip. Otherwise, just drag the title to align with the clip’s end.
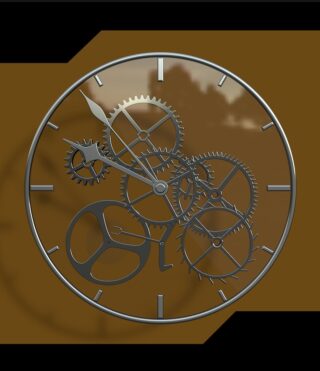
Move the playhead to about 15:05. The clock face should be fully upright and facing forward, like this:

Position the EZ Track text so that its Anchor Point is directly over the center of the clock face. To view the anchor point, single click on the text when first selecting it in the canvas. You will find a faint Red/Green arrow set with a Blue center “dot” (it’s actually another arrow pointing directly out.) Use the Red and Green arrows to position the blue dot over the clock center. (Don’t worry about accuracy at this point, you can refine it later).
Dial down the disclosure triangle on the Anchor Point Parameter. Click on the Y parameter and drag it downward (negative direction). Set it to -36. The text should align with the outer (top) ring of the clock face. Set the Anchor Point Z parameter to -6.
Move the playhead back and forth — you’ll see how the clock face will move up to “touch” the text. Move the playhead to the beginning of the title (it can be a few frames in or turn off Fade In Time.) Set the Angle X Offset to -90 either by dragging the number value or simply double click on the value and type it in. Now, to animate this effect, set the Xº/Sec to 9. (Reset the Fade In Time to 20). Play the clip. The text will animate with the top edge of the clock face.
Now, let’s complicate this just a little bit.
Set the Z Offset parameter to 90º — the text will rotate to the left side (9 o’clock) position and set the Zº/Sec to -9º. Play.
How cool is that?
Explanation
The distance traveled in the auto-animation settings is for a 10 second title length. If you displace an angle by 90º, then 9º will make up the distance over that 10 second time. More simply, no matter how long the title is set, it will still take the same factor of 10 to make up the displaced distance. (Make sense?)
For straight-line distances (XY&Z) however many pixels you offset the position, use the same amount of delta time to make back the distance, as we will see in the next exercise.
A few more simple recipes: a simple dolly, a half cylinder animation and Star Wars!

Pingback:EZ Track 3D User Guide – FCPXTemplates.com