
Annotation Marks User Guide
Annotation Marks is a set of effects that are designed to be applied to Titles, but can be added to storyline clips and generators. They have no “footprint” in the storyline — they don’t take up any room in the timeline window (*unless you need to add accessory titles).
All effects, except the Zoom Arrow, are designed to look “hand-drawn” on screen.
Effects breakdown:
- Shape effects: Circle, Rectangle, Drawn Arrow, Long Arrow, Zoom Arrow, Star and Underline.
- Text effect: Annotate 2
- Helper: Percent of Clip
With the exception of the Zoom Arrow, all the Shape effects are “drawn” on. The strokes have a “brush” or marker texture with customizable color settings. All Shape effects have three versions: one that writes on as soon as the title or clip begins, one that is delayed by 1 second and one that is delayed by 2 seconds. Most titles are only on the screen for about 5 seconds or so, and if used with video clips or longer titles, there is an available Opacity parameter to keyframe its appearance off if necessary. All the Shape effects have a First Point Offset which allows you to shorten the shape drawn (shortening from the beginning of the animated drawing effect). The First Point Offset should not be keyframed (it won’t work!) Along with rotation, scaling and “shear” distortion, these features allow you to customize how the shape appears on the screen. There are also parameters to set the stroke widths and there texture “Density” (a low value makes the marks look more “chalky” and a higher value makes the lines look more ink-like — depending on color.)
Add-on Text: Annotate 2
A text effect somewhat like an accessory “Title” effect, allows you to add additional text without creating a *separate* Title object in the storyline. It can be applied directly onto video clips. Its starting time is set by setting its Start Offset parameter to the PERCENT of the clip. For example, if you have a 10 second clip in the storyline and you need to have the text start at halfway through the clip, set its Start Offset to 50. You will not see the text until the playhead passes the 50% “mark” of the clip. Increasing the Type On parameter will give the text an animated “write on” over time. The Type On value will depend on the overall length of the clip, so, for example, a 1 minute clip with a Type On of 5 or 6 % will take the text longer to write on than a 10 second clip with the Type On set to 50 or more percent. Picking a Type On time is easy enough to do, just position the playhead after the Start Offset however long you want the type on to take, then adjust the slider until the text is all filled in.
The Helper effect: Percent of Clip
Provided as a kind of 2-way indicator for the Playhead position within any given clip (includes generators and titles). Add this effect to any clip:
Select the clip in the storyline and make a note of the Length of the clip from the time in yellow under the Timecode Clock. In this example, the length of the clip is 1 minute, 46 seconds and 12 frames. Double click on the Clip Length parameter in Percent of Clip and type in 1.46.12 (you can use colons, semicolons, commas or periods to separate the time divisions — you can also skip any leading zeros, for example: for 04:02:06, you can simply type 4.2.6 and the time will accurately be entered. Same rules for the Timecode clock pertains to the Clip Length parameter.) The Clip Length parameter should look like:
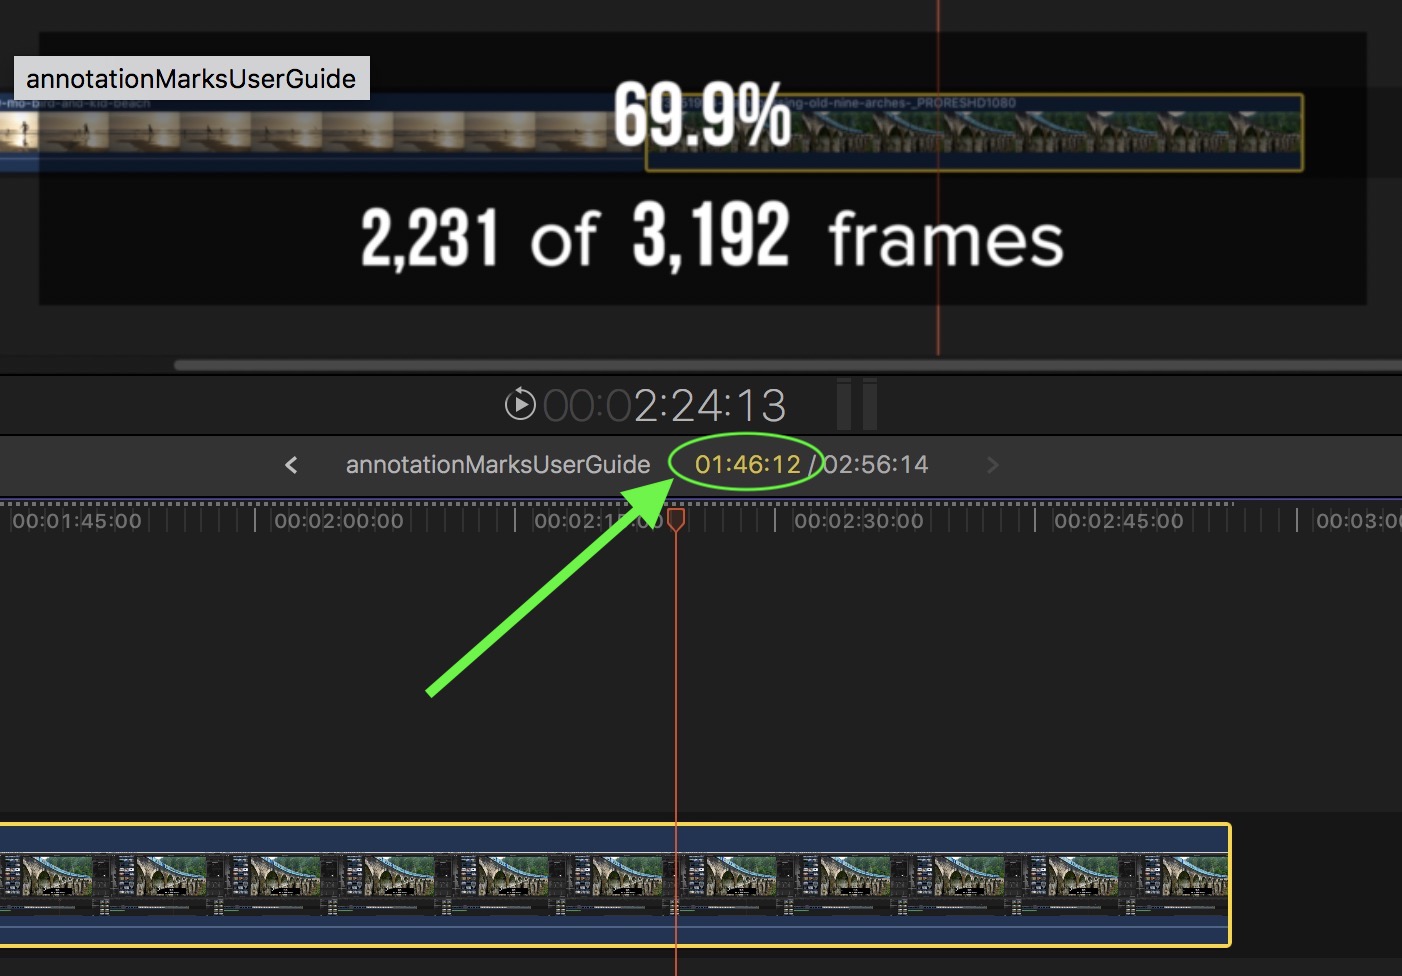

Once you fill in the Clip Length, this effect will display the frame number under the playhead and the total number of frames in the clip. Remember that the frame number values will go from 0 to Frames Total-1 — the 0th frame is the 1st frame, etc.
Using Percent of Clip gives you a starting point in percent to write on the text, and a frame count as you move the playhead. If you need the Type On to last one second, move the playhead +30 frames then adjust Type On until the text finishes its animation.
The Underline
Underline is different than the rest of the “stroked” shapes. It has a
couple of extra OnScreen Controls that allow you to bend or shape the
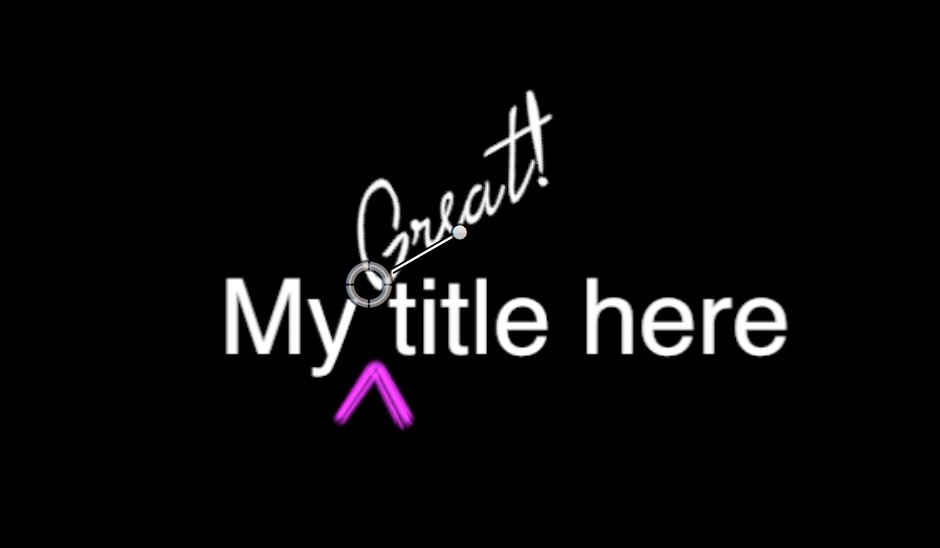
line. It can be shaped into an S-curve underline or even a “caret” (‸)
to illustrate added, “offline” text to the standard title text.
The underline is an exceptionally versatile shape.
The Zoom Arrow
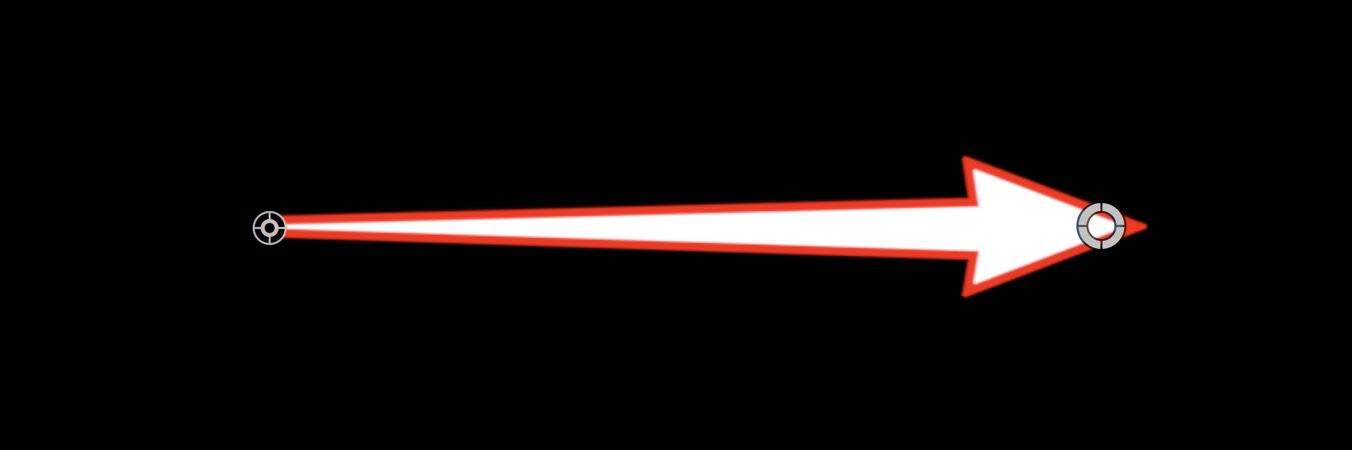
This shape is different from the others. First of all, it does not have a “hand drawn” appearance. It’s designed this way for extra added emphasis! The small black OSC is it’s originating point and the Position parameter in its inspector corresponds with its location. The larger silver OSC is the position of its tip. As you drag from its origin outward, the arrow grows in size. When both OSCs positions coincide in the Viewer, the Zoom Arrow is invisible. Keyframing an animation of its Length will make it grow. The tip OSC has a maximum “reach” (length) of 500px, however, there is a built in “Len. Multiplier” that will multiple the shapes size even though the length OSC will not extend further. It can be put to clever use in animations!
The Zoom Arrows tip OSC also determines the Arrow’s Angle (offset) which is a separate parameter from Rotation. The two can be used in tandem. Why are there two different controls? The Angle has a range limitation from -720 to 720 degrees. Rotation is limitless. Like Length and Len. Multiplier, Angle and Rotation can be put to clever use… maybe. Up to you.
What about OSCs and Text interfering with each other?
It turns out that this is not a problem. The same tools you use for different operations in the timeline pane can be used while you are working in the Viewer! When selecting and moving text, the default Select tool is active. To access OnScreen Controls under a text region, type a keyboard shortcut to change the current Tool to (B)lade, (R)ange, (T)rim, (P)osition or (H)and. The Position and Hand tools will change the cursor used. The other tools will simply display a standard arrow cursor. Type ‘A’ to revert to the standard default Select tool.
Demo:
Keep up to date with Sight-Creations on Twitter and Facebook.
A good place to see all of my effects as well as several tutorials and other demonstrations in use is on my YouTube channel.
Annotation Marks User Guide