HUD Creation Tools (HCT) is a set of effects that allow you to build copyright-free, royalty-free HUD designs you can use and reuse in your projects, forever.
This User Guide cannot possibly show you the entire extent of the use for these effects. HUD Creation Tools is entirely up to your imagination!
HUD Creation Tool is the primary effect. You can add “accents” with HUD Volume and HUD Controls. Due to an anomaly with Title templates that do not contain a Title Background (like the Basic Title), text is repeated over and over when using HUD Creation Tool, so, HUD Title Fixer is included to prevent this from happening.
Two transparent PNGs are included with the set to act as no-distraction “canvases” for designing your HUDs. These include a 16:9 format image and a 9:16 image to design vertical video HUDsH.
HCT is basically a system of masking clips with an artistic sci-fi border. The basic setup is very simple, but sophistication can easily be layered on. Never rely on stock images again! Create a new design for every use. Works with video, images, titles and generators. Two transparent PNGs are provided as a design canvas: one is 16:9 and the other 9:16 for vertical video designs.
Default setup
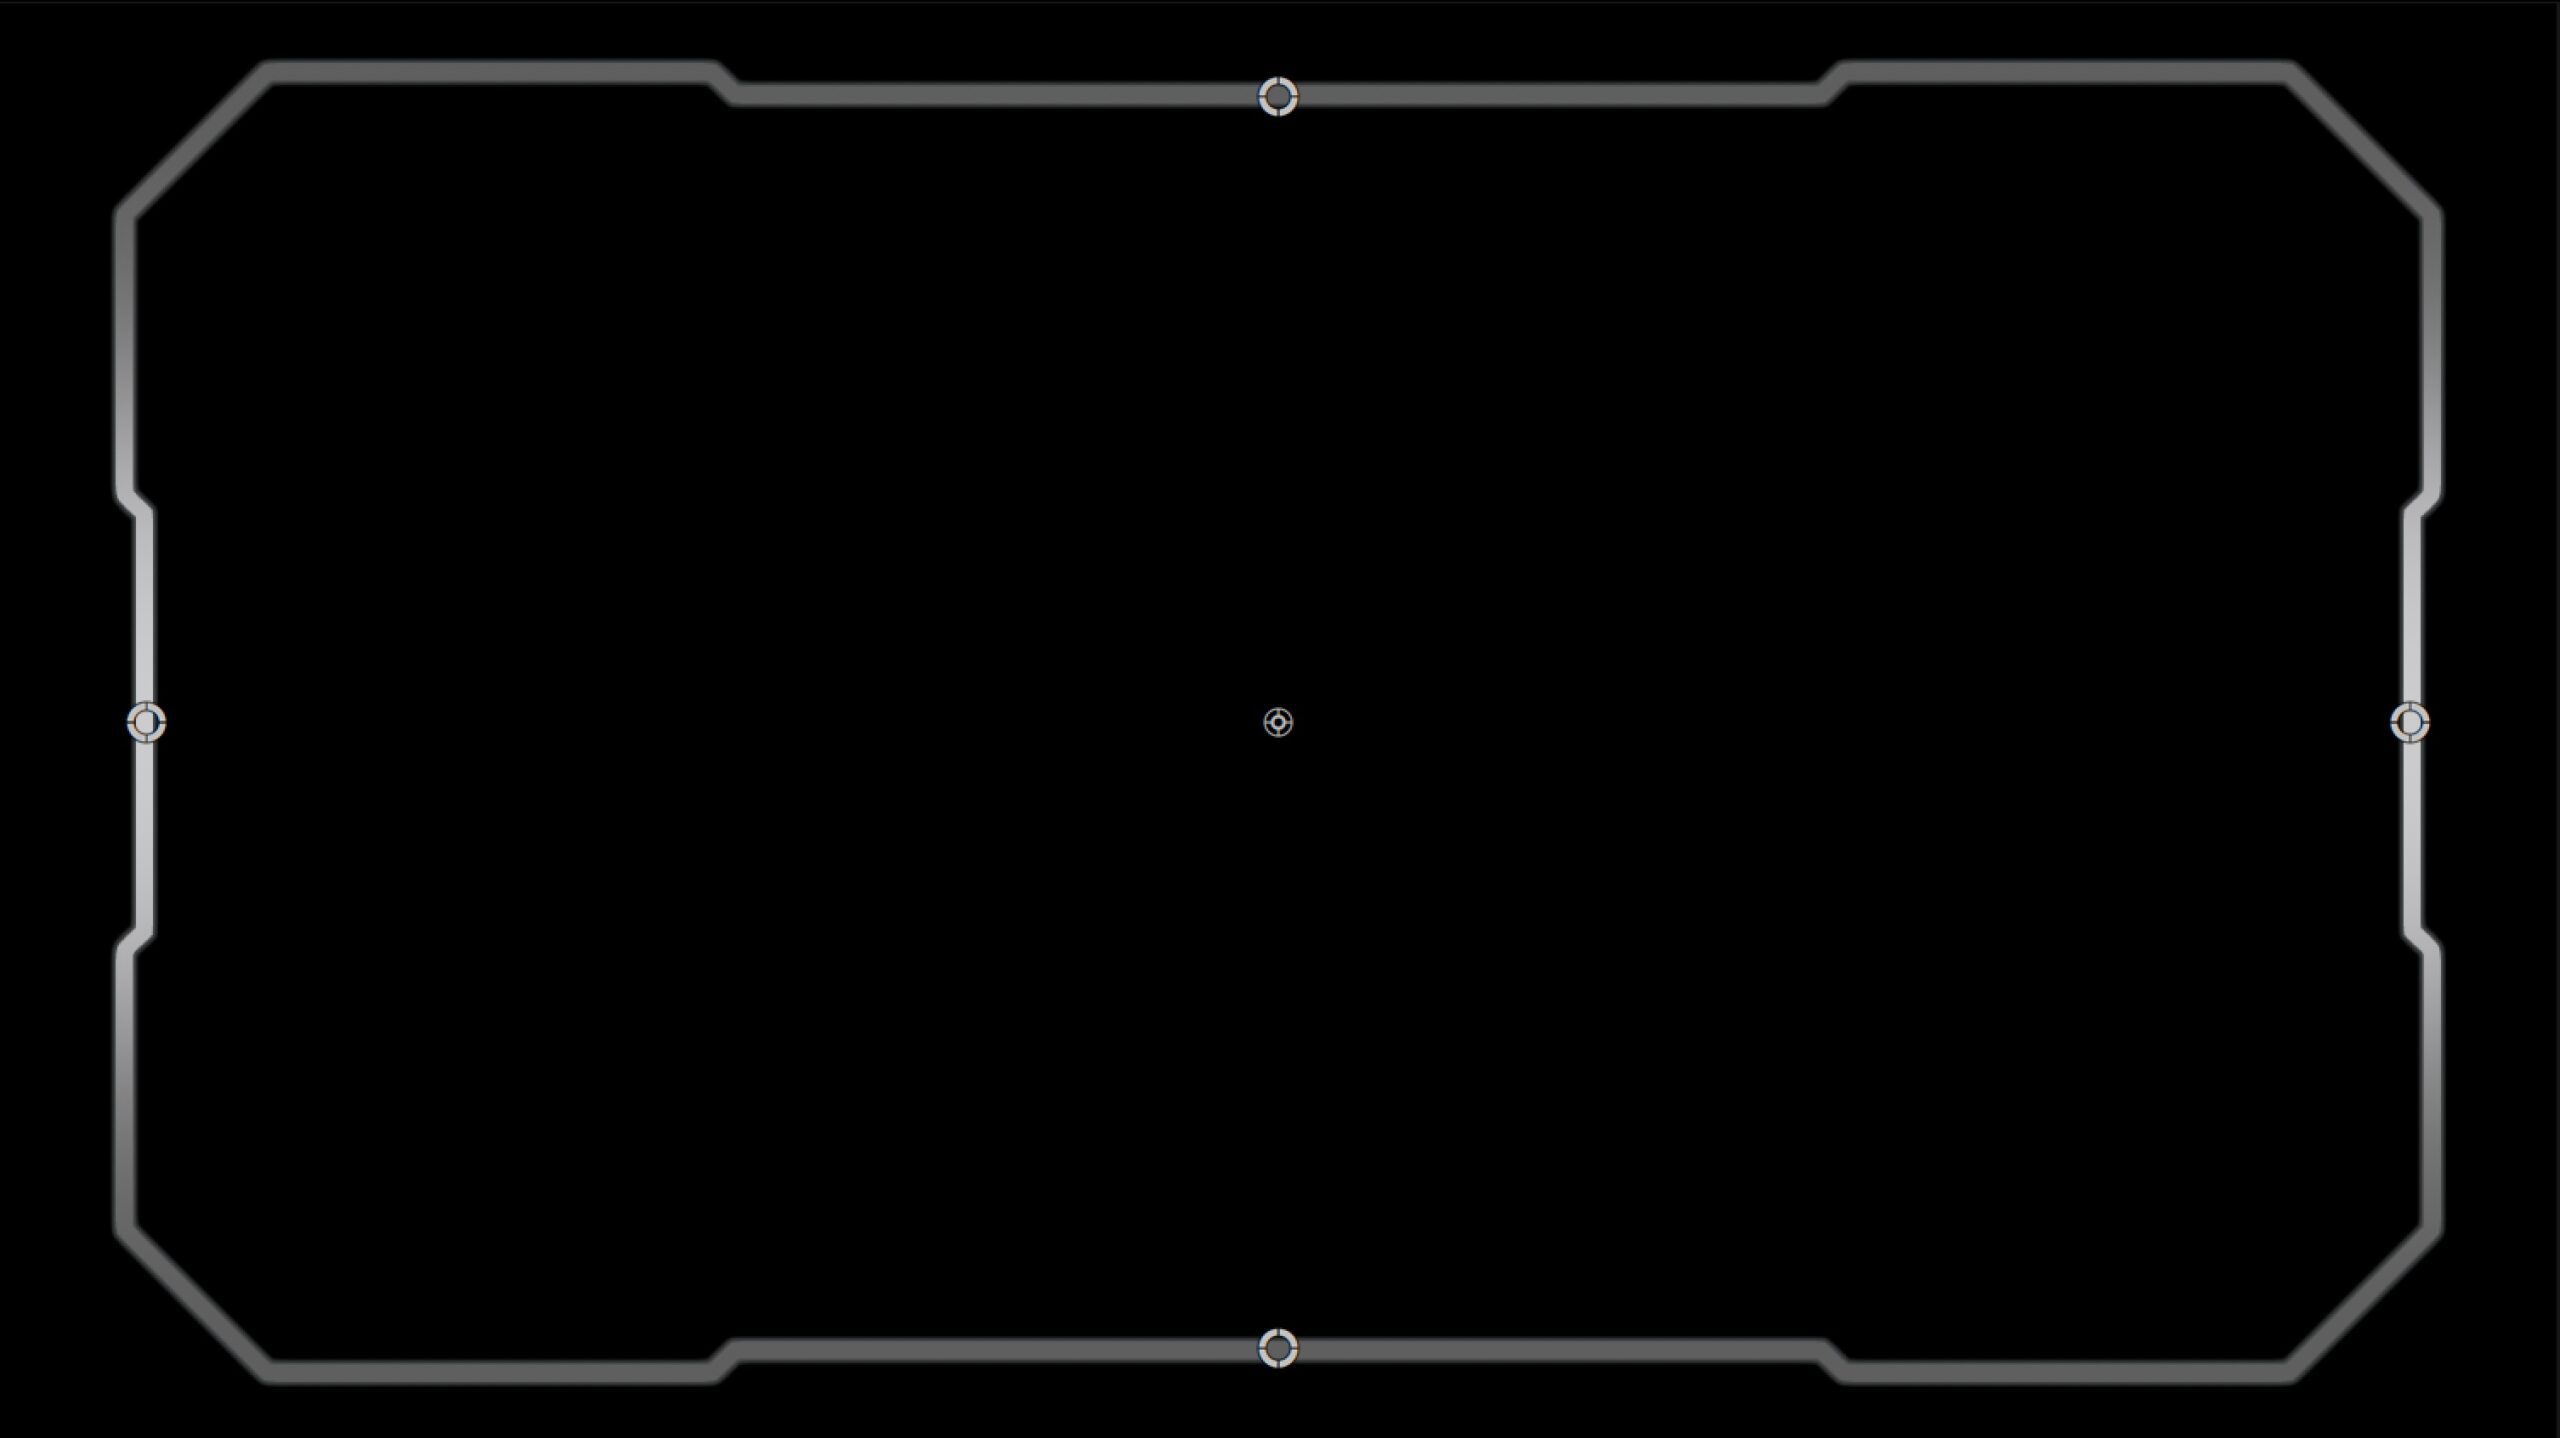
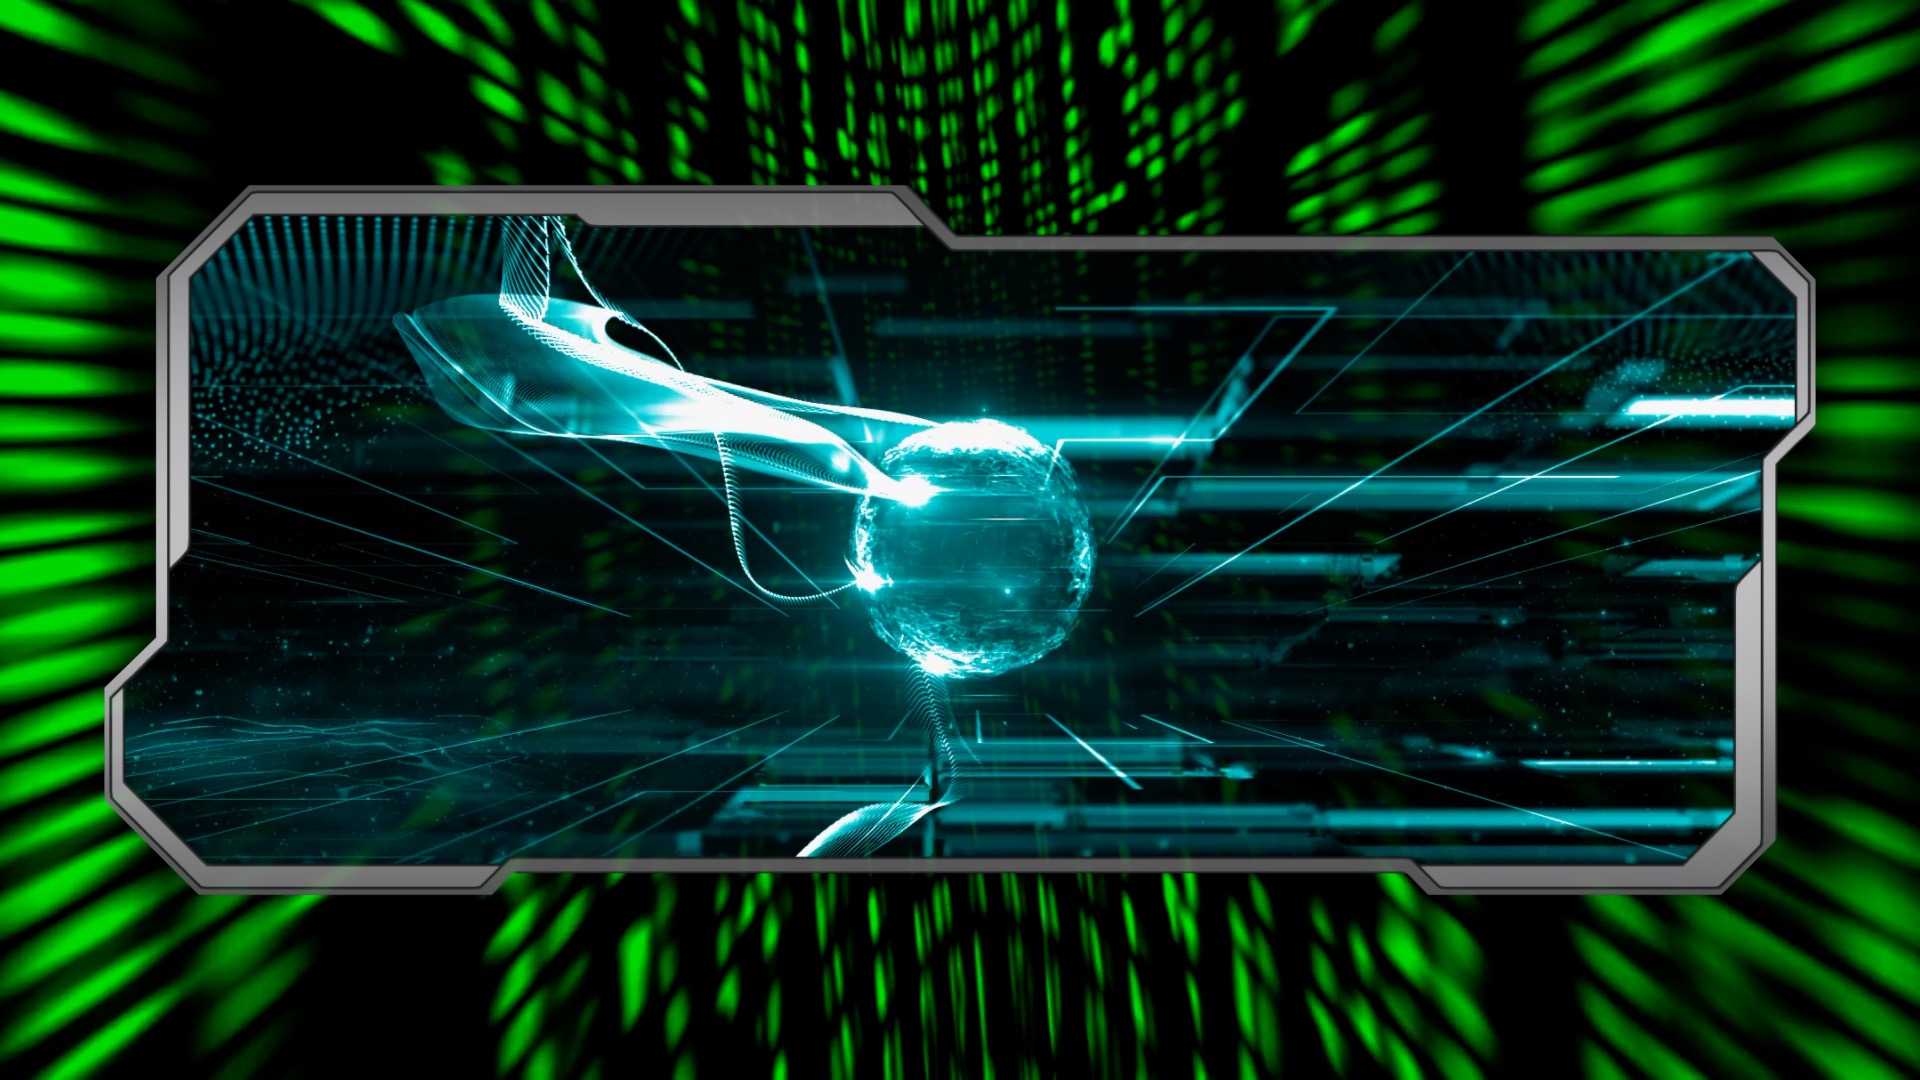
The image at right shows the default design including the OSCs (onscreen controls). There are OSCs on each edge and a smaller one in the center for positioning — design first, then position.
The movable edge pieces are simply trapezoids which you will find out when pushing the controls. Suffice it to say, if you stay within the bounds, you can create the cut-ins for the edges. Their Parameters can be found in the INDENTS section.
Parameters (by section)
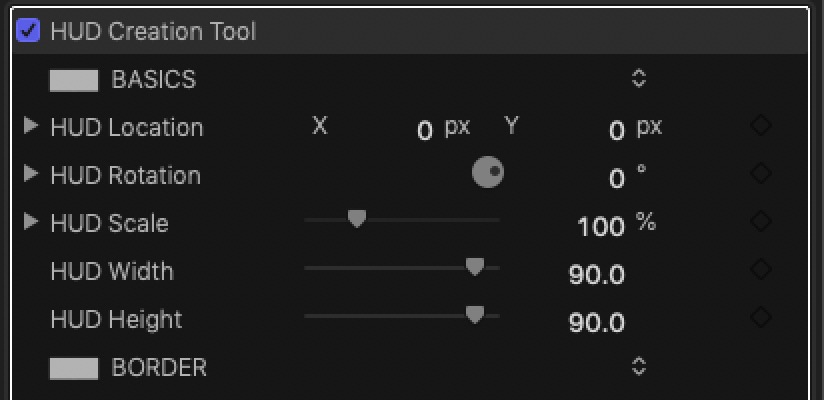
When starting a design, the first parameters you need to deal with are HUD Width and HUD Height. Use these parameters to size your HUD design.
After completing your design, the other parameters in this section will come into play. There at the top for convenience using your designs in your videos. They can all be keyframed for animations.
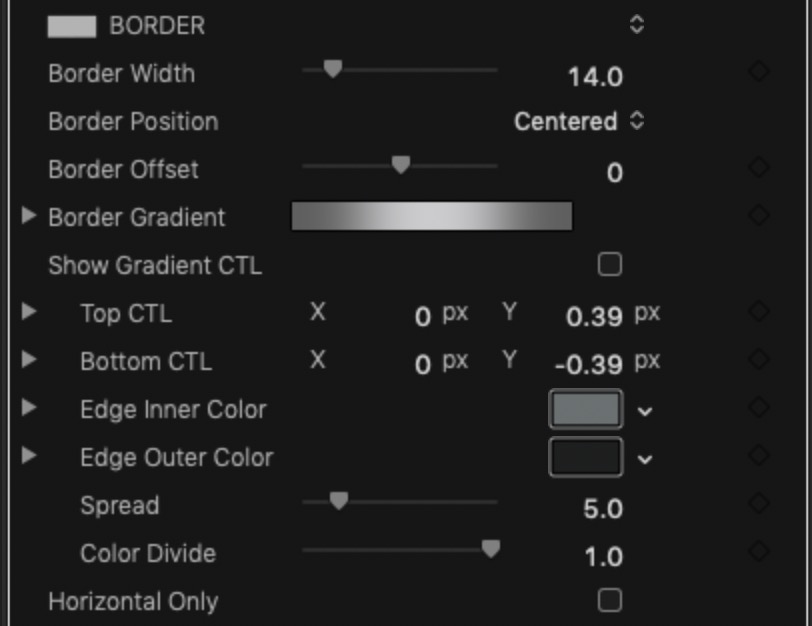
Border
The border is an outline. It is consistent around the entire shape. (We will use further methods to “sculpt” the border later.)
The border is part of a Gradient that is masked . The features of the gradient are included with this effect. There is an OSC to control the shading of the gradient and it is set up, by default, to look light light highlighting the left and right sides. To access the OSC, select the Show Gradient CTL option.
Border Width will set the thickness of the border outline, very straightforward.
Border Position is a little harder to describe. The border exists on the edge of the mask you are creating. Border Position allows you to set which side of the mask outline it is applied to: Centered straddles the outline; Outside places the border on the outside of the mask edge; Inside places the border inside the mask edge. These options will come into play when creating multi-level designs.
Border Offset makes it possible to move the border completely away from the mask edge. You never know, it may come in handy! It will depend on your design.
Border Gradient: It is possible to color the outer edge any way you like. If you know how to manipulate Gradients in Final Cut, your options are greatly expanded. However, for Border Gradient, you will not be able to change the Start and End parameters without using the OSC (it will be easier that way anyway!) It is possible to show or hide the Gradient Start/End control OSCs. The Gradient can be animated by keyframing the Top CTL and Bottom CTL parameters.
Edge Inner Color and Edge Outer Color is a “padded” layer of coloring that gives the border more of a 3D appearance (at least the way it is set up.) These colors can be used to create a more accented edge highlights (light) or can be spread out for other effects. The Spread parameter determines its thickness and Color Divide is the point between the two colors. By default, the Spread is 5 pixels and the Color divide is all the way to the dark side giving the appearance of a fine dark edge.
Horizontal Only is an interesting variation. The shading effects of Edge Inner/Outer Colors are only applied in the horizontal direction!
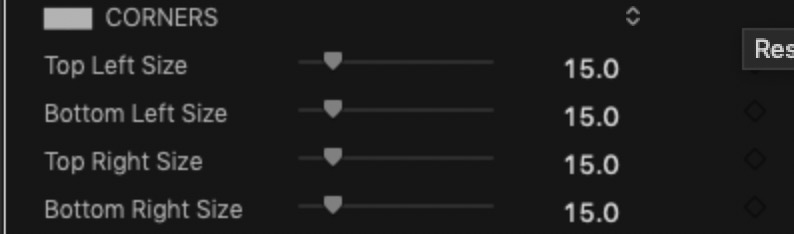
Corners
Unlike the indents which are freely maneuverable, the corners are permanently fixed to their respective edges. You can control the lengths of the corners with these controls. A value of 0 will create square corners, but for this effect, that is not usually recommended!
Indents
Indents are attached to their respect OSCs. You can drag them around to create the inset lines along the edges of the HUD. The parameter “centers” represent the location of the OSC controls.
Note: OSC alignments to the HUD design are only maintained while the display is centered. They will respond to resetting the HUD Width and HUD Height but repositioning will separate the OSCs from their original orientation to the overall design. This is why it is recommended to create your design before position, rotation and scaling changes.
Each indent has a location parameter and a size parameter. The Size parameter is in percent. There is a minimum (0) size and a maximum (100%) that is the width of the design “canvas”.
There is an option to show or hide the indent OSCs.
Extended
The Extended section has controls to alter the content of the clip the HUD effect is applied to. Scale Clip will resize the clip. Reducing the Clip Opacity to 95% will give the perfect amount of transparency to show through a background clip.
Pan Horizontal and Pan Vertical will allow you to offset the clip inside the HUD to realign it to taste.
There is a solid background available that is applied behind the clip that can be used to apply a bit of a tint to the HUD “screen” display.
Taking it to the next level
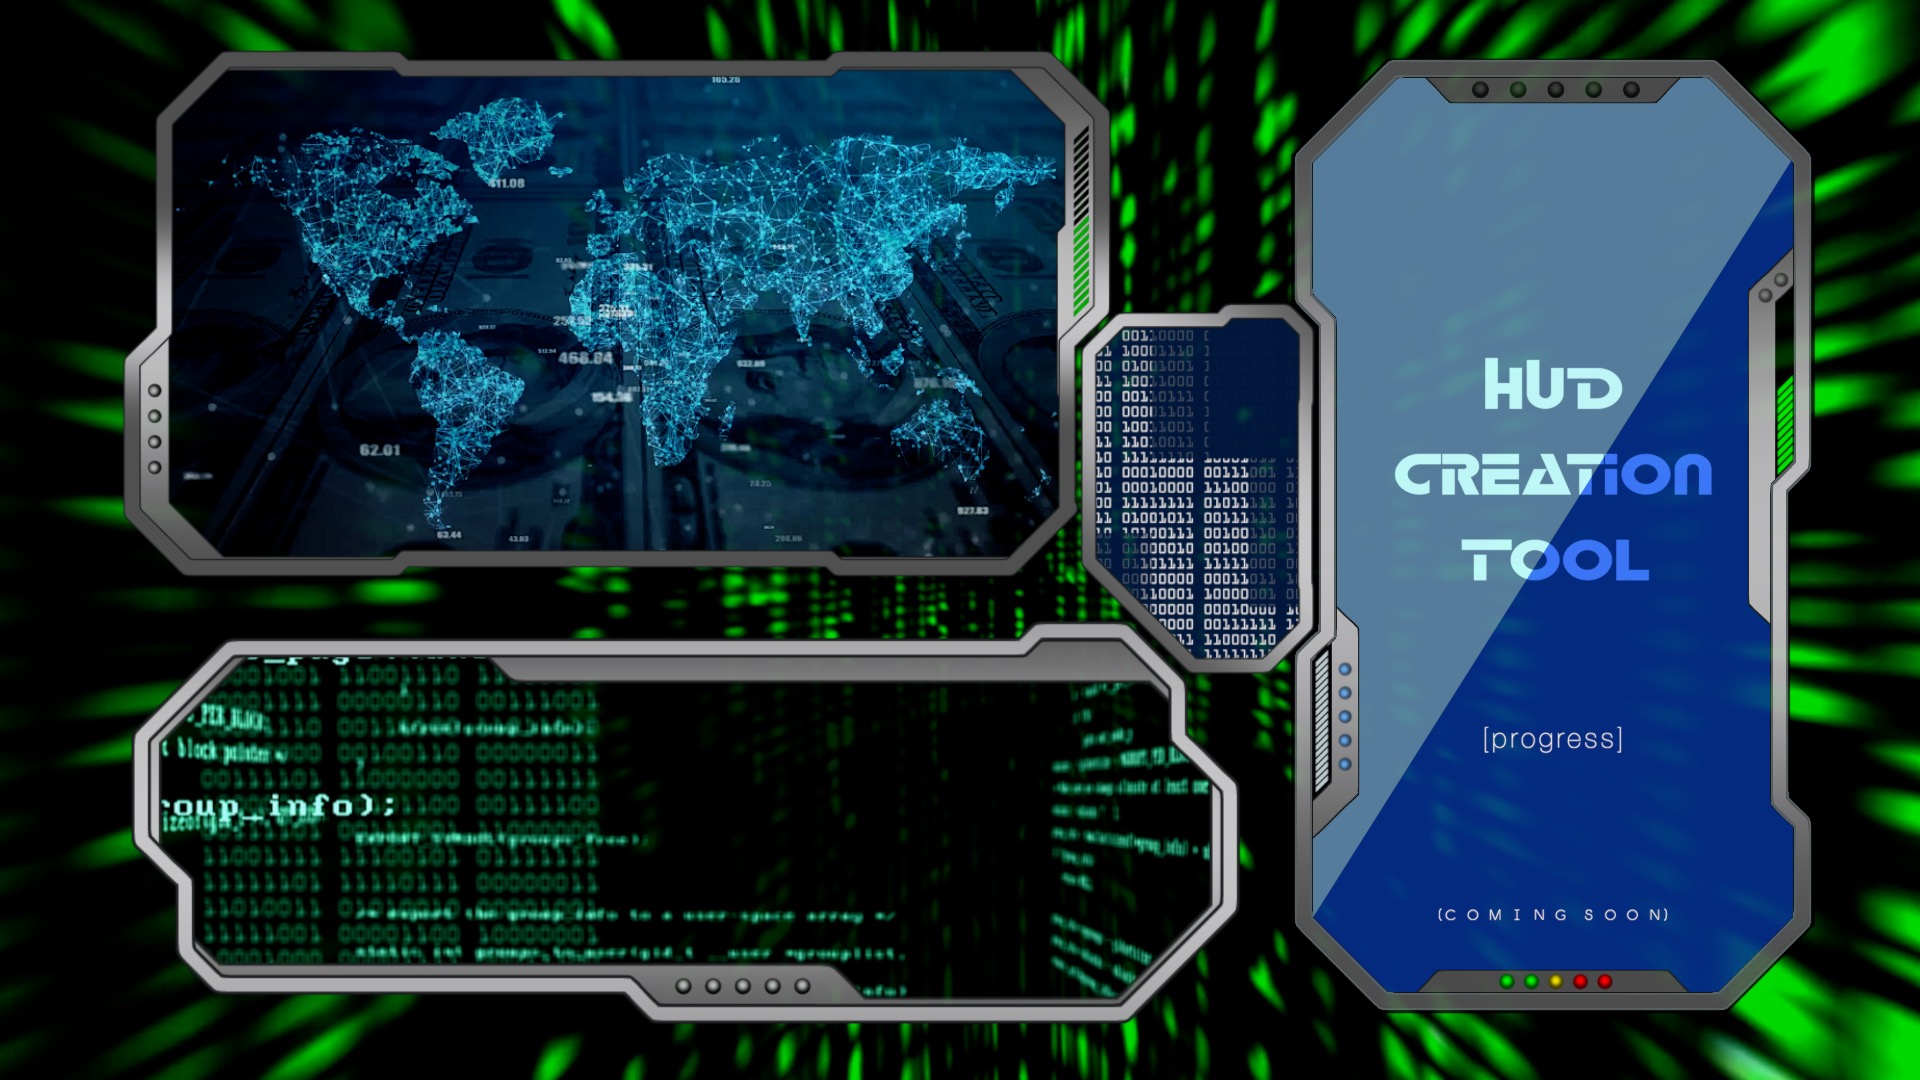
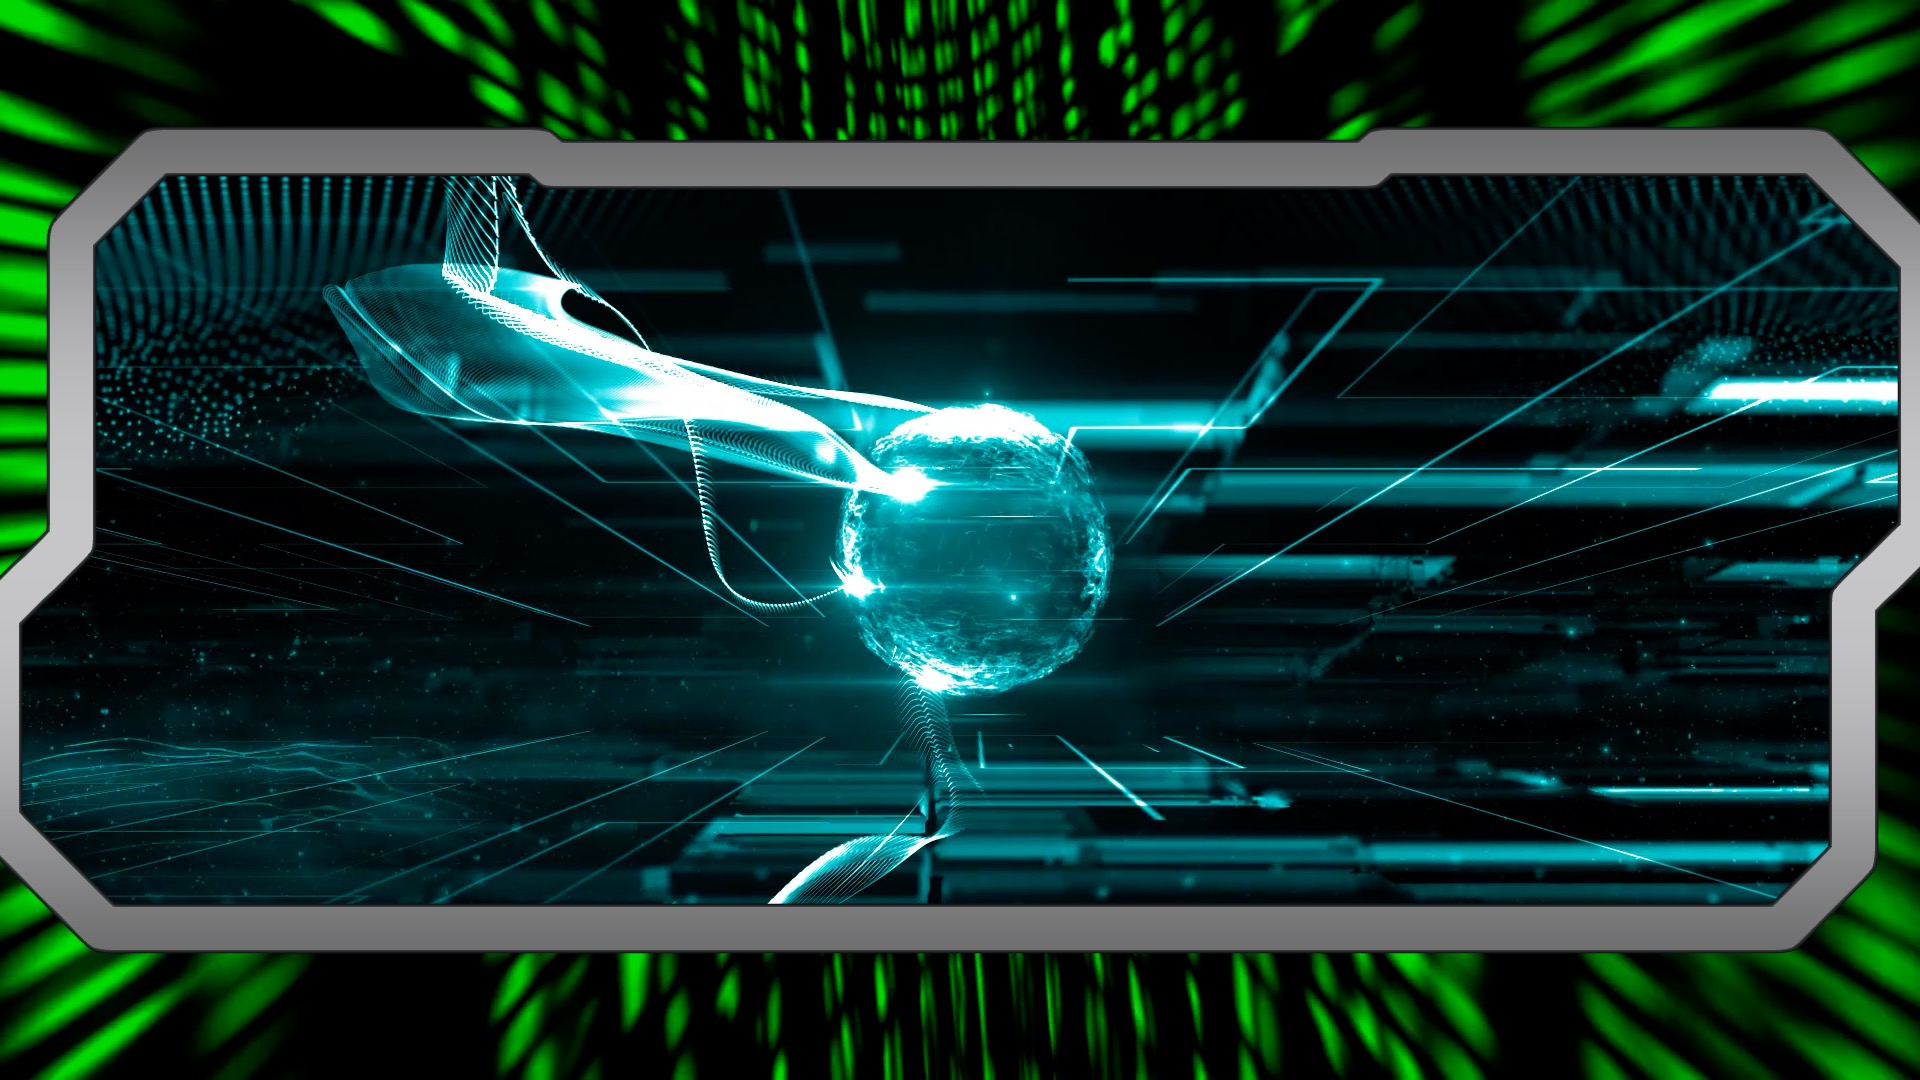
A single outline design is typically too simple. These can be convenient as “filler” designs setting them in between two or more other designs, as in the example to the right.
More complex and visually pleasing effects can be achieved simply by adding new layers of HUD Creation Tool. I don’t know how many can be layered, I stop at three, the last one is usually borderless and used solely as a positional control layer for the effect, which will include HUD Volume and HUD Controls effects.
Building up a design:
Basic, one layer, HUD design
Two layers, narrow outline overlays the wider outline and overlaps in areas to create more interest.
Three layers — the “top” layer has it’s border opacity set to transparent. Mask thins out the layer two HUD border creating further refinement. It also acts as the “global” control for all layers below it (including Volume and Controls if used.)
Watch how easy this all is:
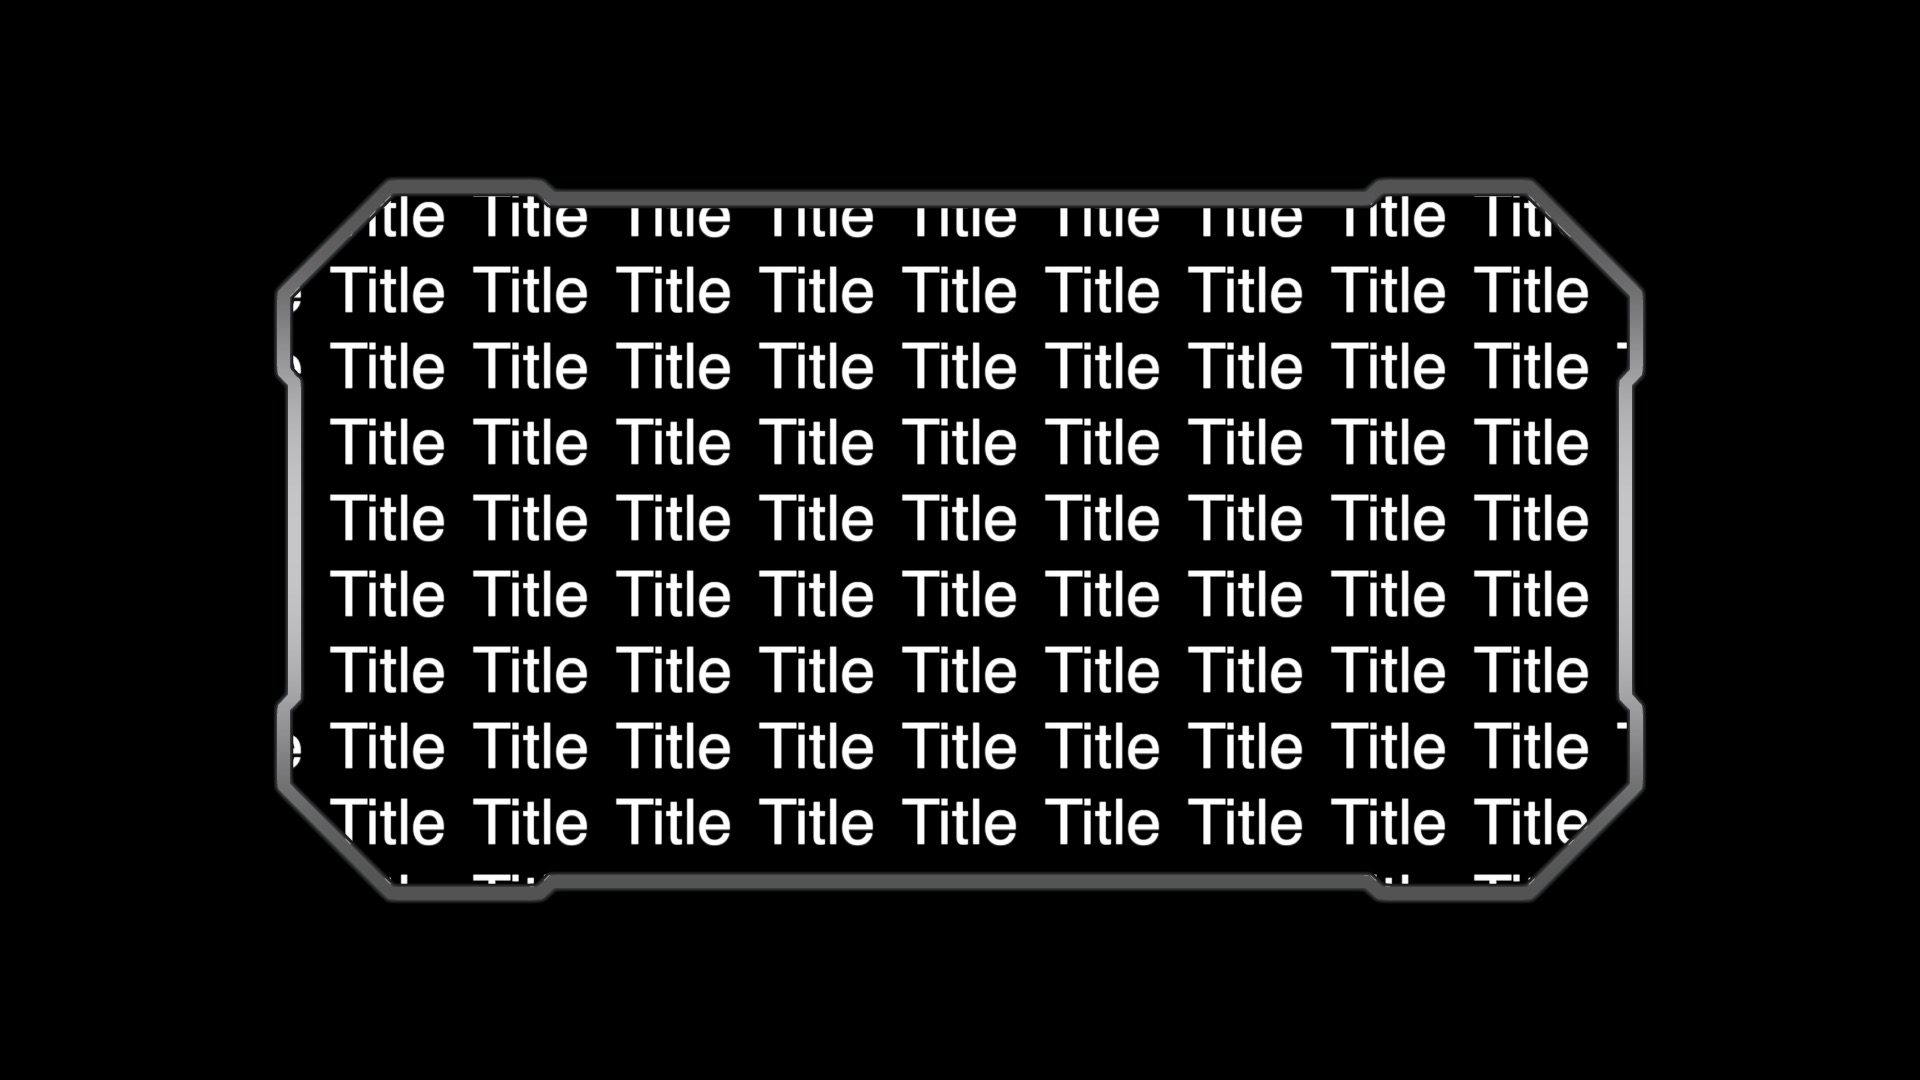
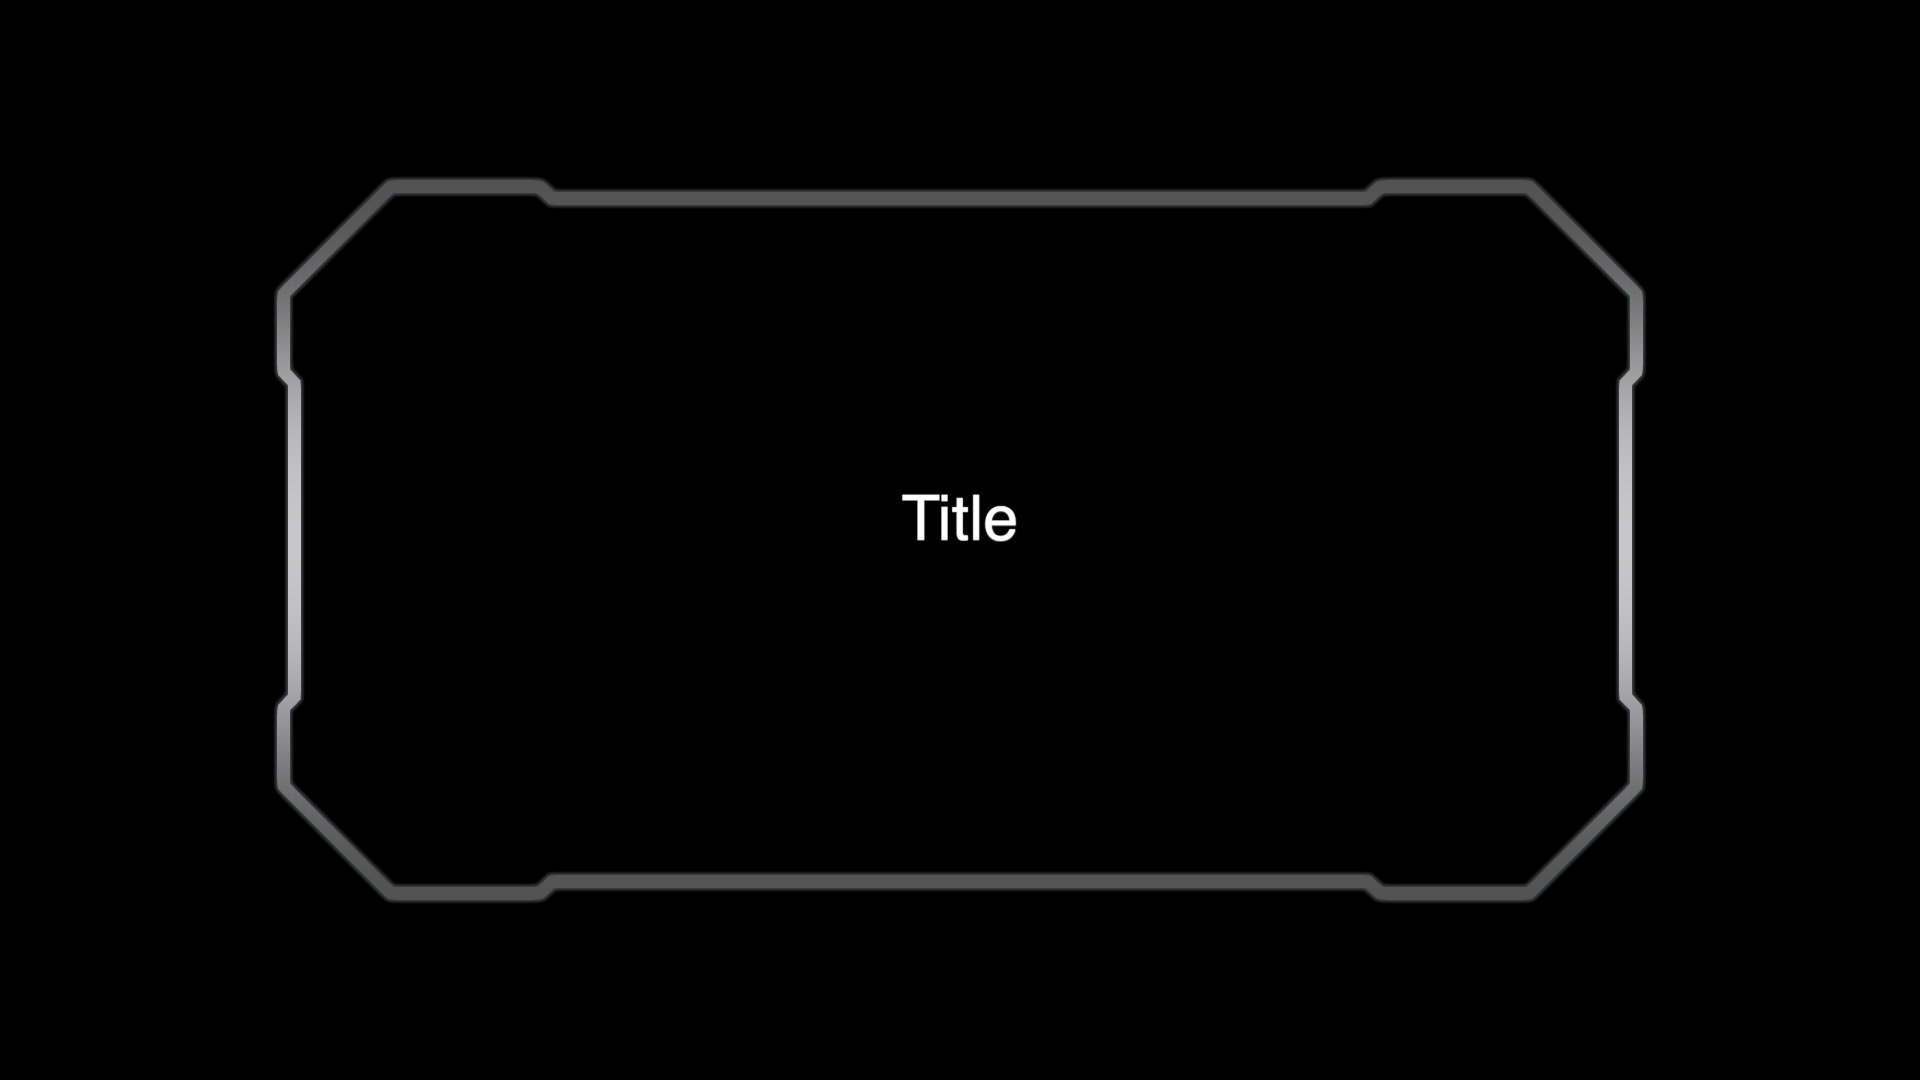
About Title Fixer
Some titles made for Final Cut lack what is known in Motion as a Title Background. For these titles, when HCT is applied, this repeating pattern of the title will occur.
Use HUD Title Fixer before adding HUD Creation Tool to fix this condition.
The images at right display they difference when HUD Title Fixer is not present (above) and when it is (below).
Installation Instructions. HUD Creation Tools, HUD Volume, HUD Controls and HUD Title Fixer are all Effect Templates.
Keep up to date with Sight-Creations on Twitter and Facebook.
A good place to see all of my effects as well as several tutorials and other demonstrations in use is on my YouTube channel.